Charred Wood Blog
How Waterproof Wood: UK Weather Guide

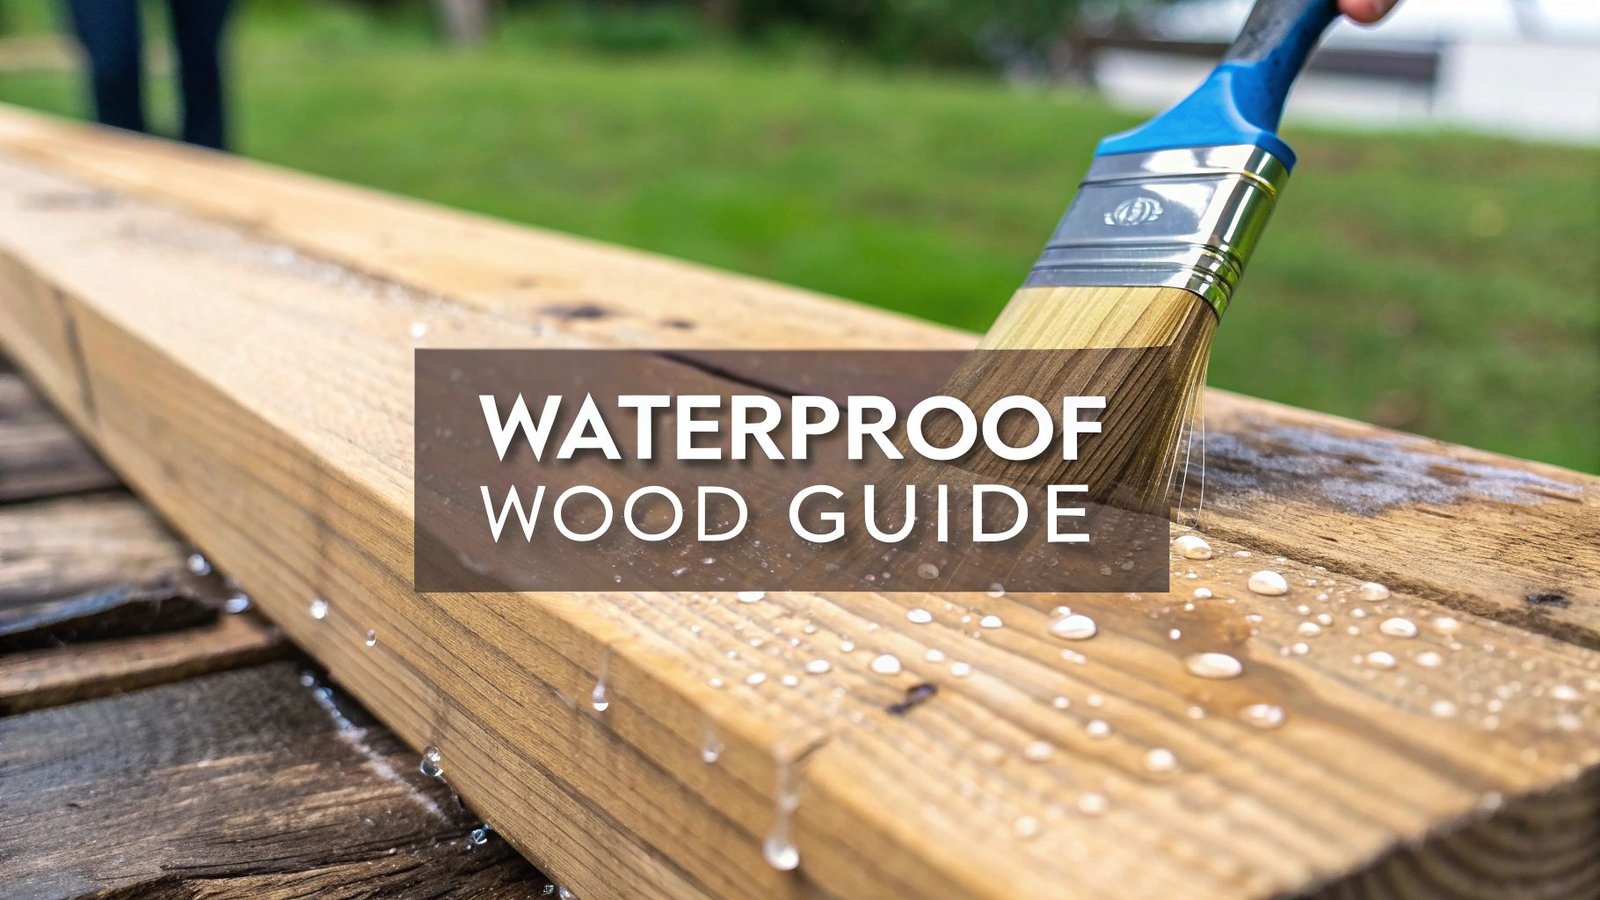
To truly waterproof wood, you need to apply a finish that acts as a barrier, stopping moisture from ever seeping into the timber’s fibres. This could be a penetrating oil that soaks in deep or a film-forming sealant that sits on top. But the real secret isn’t just slapping on a product. It’s all about the prep work—thoroughly cleaning, sanding, and letting the wood dry completely before you even think about applying the first of several thin coats. Get this right, and you’ll sidestep water damage for years to come.
Why Wood Needs Protection From UK Weather
Before we get into the nuts and bolts of waterproofing, it’s worth understanding the constant battle your timber is fighting, especially with the UK’s notoriously damp climate. Wood is a natural, porous material. Think of its internal structure as a tight bundle of microscopic straws, ready and waiting to soak up any moisture they touch.
This tendency to absorb water is the root cause of so many headaches for homeowners and tradespeople alike. When wood gets wet, it swells. As it dries out, it shrinks back. This relentless cycle of expansion and contraction is where the real problems begin.
The Consequences of Moisture Exposure
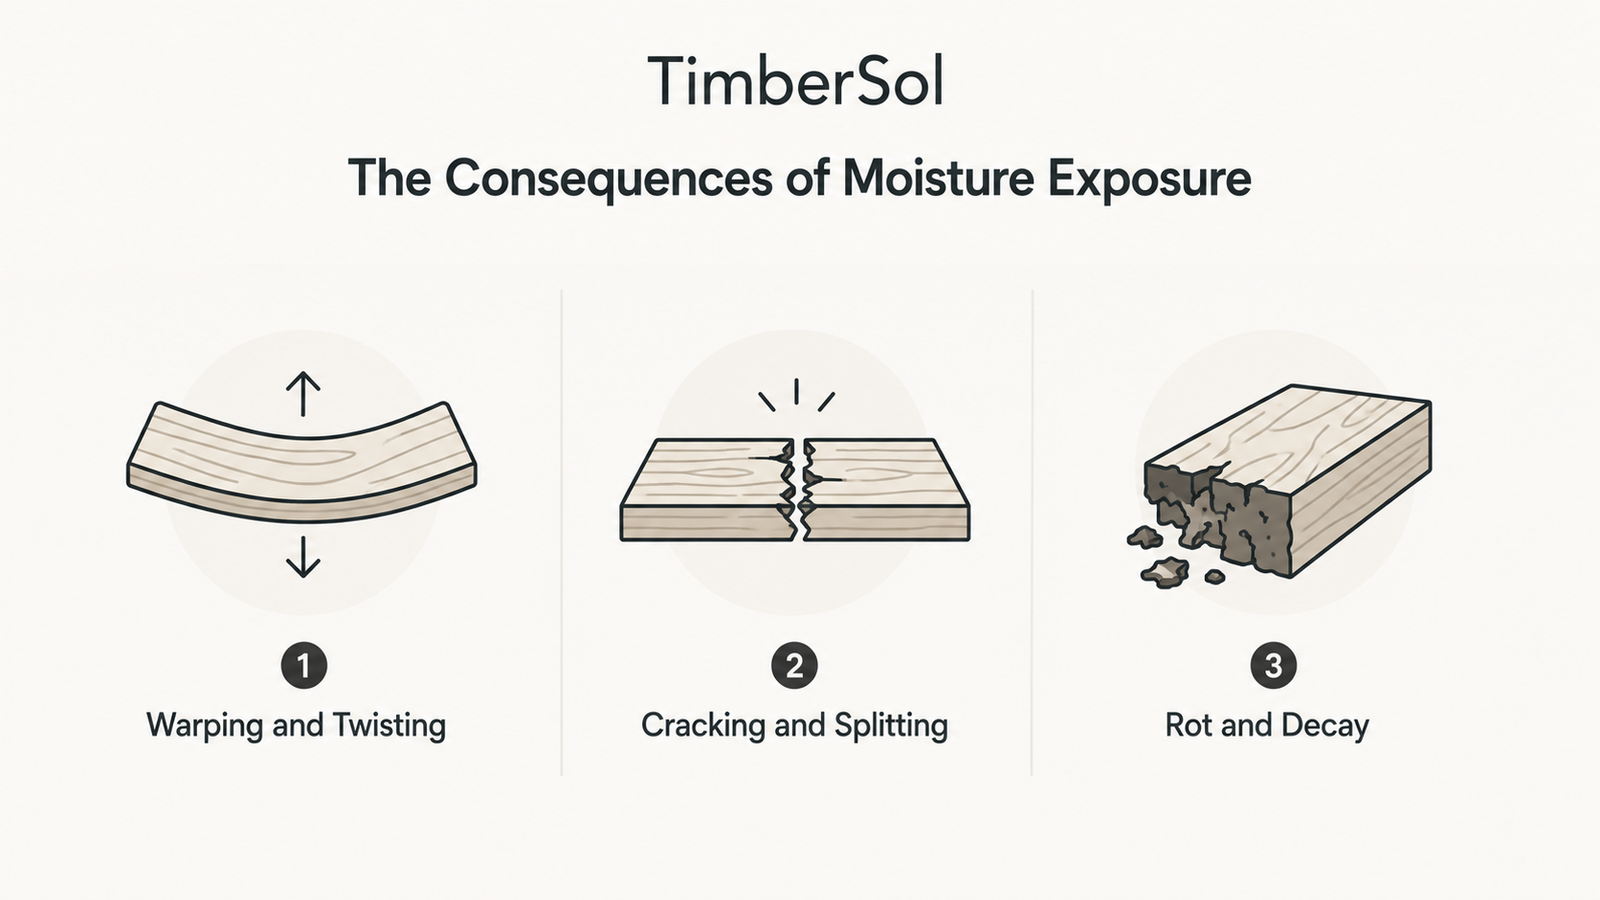
Without a proper protective barrier, any wood left out in the elements will eventually start to show signs of stress. The constant dampness leads to a few common types of degradation that will ruin both the look and the structural integrity of your timber.
Here’s what you’re up against:
- Warping and Twisting: As different parts of a board absorb and release moisture at different rates, the wood starts to bend, cup, and twist. That perfectly flat deck board can quickly take on a shallow ‘U’ shape.
- Cracking and Splitting: All that stress from the swelling and shrinking eventually causes the wood fibres to tear apart, leading to ugly and damaging cracks that only let more water in.
- Rot and Decay: This is the big one. Sustained dampness creates the ideal breeding ground for fungi. This is what we call rot, and it actively breaks down the wood, turning a solid, strong piece of timber into a soft, crumbling mess.
The real goal of waterproofing isn’t just about keeping wood dry—it’s about creating stability. By stopping that constant fluctuation in moisture content, you prevent the movement that causes all this physical damage and decay. You’re essentially locking the wood in place and dramatically extending its lifespan.
Water-Resistant vs Waterproof
It’s also important to get the terminology right, as there’s a big difference between ‘water-resistant’ and ‘waterproof’. A water-resistant finish will make water bead up on the surface for a while, but give it enough time, and moisture will eventually find its way through. A truly waterproof finish creates an impenetrable barrier that stops water from ever reaching the wood fibres in the first place.
The type of wood you’re working with matters, too. In the UK, our timber production is mostly made up of softwoods (94%), which vary in their natural ability to resist moisture. The other 6% is hardwoods like oak, which are naturally more dense and better at repelling water. Knowing the characteristics of the timber you have can help you choose the right waterproofing strategy. If you’re interested in the details, you can learn more about UK timber production and its impact on conservation from the Office for National Statistics.
Ultimately, getting your head around this ‘why’ is the best foundation for learning the ‘how’. When you know exactly what you’re fighting against, you can make sure your waterproofing efforts deliver real, lasting protection.
Preparing Wood for a Flawless Waterproof Finish
The real secret to a durable, waterproof barrier isn’t found in a can of sealant—it’s in the prep work you do beforehand. I’ve seen countless waterproofing jobs fail, not because of the product, but because this foundational stage was rushed or skipped entirely. Getting the preparation right is what separates an amateur job from a professional, long-lasting finish that can truly stand up to the temperamental UK weather.
Think of it this way: without proper prep, you’re just applying a protective layer over dirt, mildew, or unstable wood fibres. That’s a guaranteed recipe for peeling, flaking, and having to do the whole job again next year.
Start with a Clean Slate
Before you even pick up a piece of sandpaper, the wood has to be completely clean. Outdoor timber collects a stubborn layer of grime, green algae, and often the flaky remnants of old, failing finishes. All of it has to go.
For weathered garden furniture or a grey-looking fence, a stiff brush and a good quality wood cleaner will usually do the trick. If you’re dealing with more stubborn stains or black mildew spots, a mixture of one part household bleach to three parts water can work wonders. Just be sure to test it on a small, hidden area first to check for any discolouration.
After a thorough scrub, rinse the surface with plenty of clean water. You need to get rid of every trace of cleaner or bleach, as any residue will interfere with the sealant’s ability to bond properly with the wood.
The Critical Role of Sanding
Once the wood is clean and—this is crucial—completely dry, it’s time to sand. Sanding does two very important things. First, it smooths out any remaining imperfections and gets rid of the last bits of old finish. More importantly, it opens up the wood’s pores. This slight roughening of the surface gives the waterproofing product something to physically grip onto, creating a much stronger mechanical bond.
You’re not trying to get the surface as smooth as glass. In fact, sanding with too fine a grit can actually polish the wood, which closes up the pores and makes it harder for the sealant to soak in.
- For rough, weathered timber: Start with a medium-grit sandpaper (around 80-grit) to knock down the fuzzy, splintered fibres and level the surface.
- For newer or smoother wood: A finer 120-grit paper is usually all you need to create the perfect texture for the sealant to adhere to.
Always sand in the direction of the wood grain. Going against it creates nasty scratches that will stick out like a sore thumb once you apply your finish.
Ensuring the Wood Is Bone-Dry
This might be the single most important step in the entire process. Applying any kind of sealant to damp wood is a disaster waiting to happen. It traps moisture inside the timber, which inevitably leads to rot and decay from the inside out, completely defeating the purpose of all your hard work.
Pro Tip: If you’re unsure if the wood is dry enough, try the plastic sheet test. Tape a small square of clear plastic tightly to the wood surface and leave it for 24 hours. If you see any condensation on the underside of the plastic when you peel it back, the wood is still too wet. Give it more time in a well-ventilated spot before you even think about sealing it.
Choosing the Right Waterproofing Product
Walking into a DIY shop can feel a bit overwhelming. You’re faced with an entire aisle of tins, tubs, and bottles, all promising ultimate protection for your timber. The secret to picking the right one with confidence isn’t just about grabbing the most expensive tin; it’s about matching the product to your specific project, the type of wood, and the final look you’re after.
At its core, your choice boils down to three main families of products: penetrating oils, film-forming finishes, and modern synthetic sealants. Each has its own personality, with distinct strengths and weaknesses that make it perfect for some jobs and completely wrong for others.
Penetrating Oils: Natural Protection from the Inside Out
Oils like Tung and Linseed work their magic by soaking deep into the wood’s fibres. Instead of sitting on the surface like a coat of paint, they fill the pores of the timber and repel water from within. This is a brilliant approach if you want to keep the natural texture and feel of the wood.
The biggest draw here is the rich, deep finish they provide, which really makes the grain pop without adding a glossy, artificial sheen. They’re also incredibly simple to apply and even easier to repair. When a spot starts to look a bit tired, you just wipe on another coat—no need to sand the whole thing back. The trade-off? They offer less protection against knocks and scrapes and usually need a top-up every year or so, especially for furniture left out in the elements.
- Best for: Garden benches, rustic outdoor tables, and any project where you want the wood to still feel like wood.
- Real-World Scenario: Imagine you’ve just built a beautiful cedar garden bench. A few coats of Tung oil will not only protect it from the rain but also enhance its warm, natural colour, leaving a surface that feels organic, not coated in plastic.
Film-Forming Finishes: The Tough Outer Shell
This category is home to the heavy hitters: varnishes and polyurethanes. As the name suggests, they cure to form a hard, durable film on top of the wood. Think of it as a clear coat of armour. This creates a formidable barrier against moisture and physical wear, making them the undisputed champions of durability.
Marine spar varnish, for example, is packed with UV inhibitors and is more flexible to handle the expansion and contraction of wood in harsh marine environments.
The downside is that this protective layer can sometimes look and feel a bit plasticky, obscuring the natural texture you might love. Application requires a bit more care, too—drips, runs, and pesky dust bubbles can be a real headache. And if that tough film gets breached by a deep scratch, water can creep underneath, causing the finish to bubble and peel. Fixing it often means a full strip-and-refinish job.
When you’re weighing your options, understanding the fundamentals can make all the difference. Knowing the pros and cons of oil-based vs. water-based stains is incredibly helpful, as the choice impacts everything from drying time and fumes to the final colour.
Modern Synthetic Sealants: High-Tech Water Repellency
The latest generation of synthetic sealants and water-repellent preservatives offers a seriously high-tech approach to waterproofing. These formulas often use silicones, advanced resins, or other polymers to create an extremely hydrophobic (water-hating) surface. They are engineered for maximum water repellency and can be incredibly long-lasting.
Many are crystal clear and won’t significantly alter the colour of your wood, which is perfect if you want to preserve that lovely, silvery weathered look on an old fence or deck. While they excel at shedding water, some may offer less UV protection than a traditional pigmented varnish.
It’s also crucial to think about where you’re using them. Many powerful sealants contain chemicals you wouldn’t want leaching into your vegetable patch. For projects like raised garden beds, it’s far safer to look into the excellent range of non-toxic wood preservatives now available.
Ultimately, picking the right product is about understanding the mission. Here’s a quick breakdown to help you decide.
Waterproofing Product Comparison
| Product Type | Pros | Cons | Best Use Case |
|---|---|---|---|
| Penetrating Oils | Enhances natural grain, easy to apply and repair, feels like real wood. | Lower durability against scratches, requires frequent reapplication (often annually). | Garden furniture, decking, rustic projects where natural look is key. |
| Film-Forming Finishes | Excellent durability, highly resistant to moisture and UV rays. | Can look and feel plasticky, difficult to spot-repair, can trap moisture if breached. | Boat trim, front doors, outdoor window frames, high-traffic areas. |
| Synthetic Sealants | Superior water repellency, often clear and non-colouring, long-lasting. | May offer less UV protection, can contain harsh chemicals unsuitable for some uses. | Fences, sheds, cladding, preserving a weathered look. |
Choosing the right finish isn’t just a final step; it’s what ensures your hard work stands the test of time against the Great British weather. By matching the product to the project, you’ll get a result that not only looks great but lasts for years to come.
Mastering Your Application Technique
So, you’ve done the hard graft of prepping the timber and you’ve got your waterproofing product picked out. This is the moment where it all comes together. The truth is, even the best sealant on the market will let you down if it’s applied poorly, leaving you with drips, an uneven finish, and weak spots that are an open invitation for moisture.
The aim here isn’t just to get the product on the wood. It’s to create a flawless, unbroken barrier. That’s why laying down several thin, even coats is always better than slapping on one thick, gloopy layer. A heavy coat never seems to cure properly; it just skins over on the surface while staying soft underneath, and it’s almost guaranteed to sag or run.
Choosing Your Tools Wisely
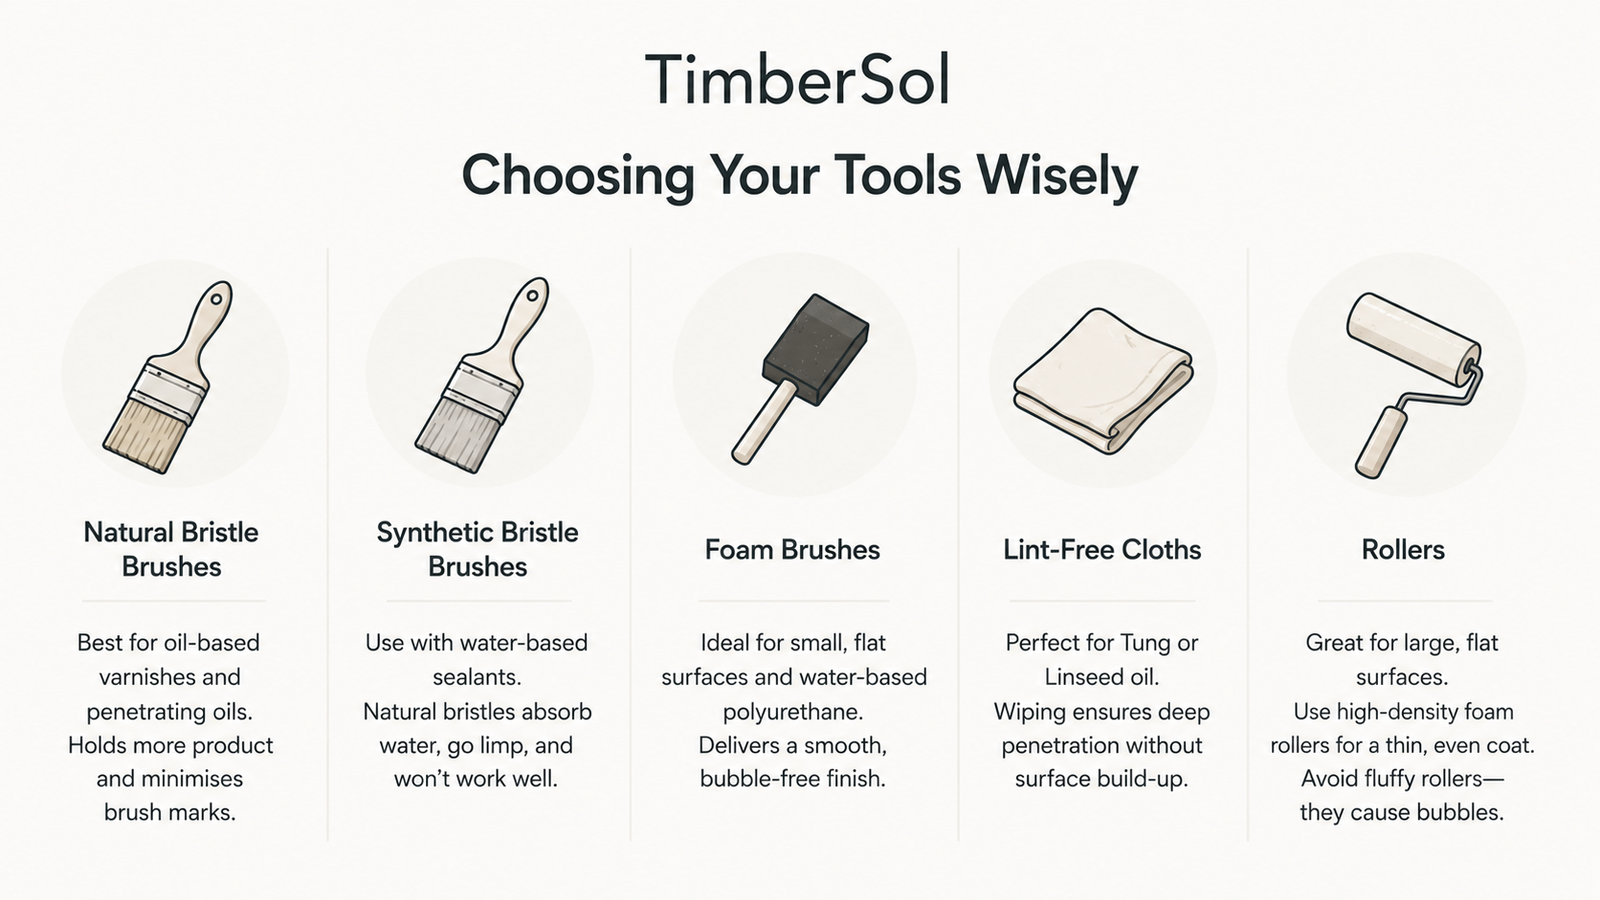
The tool you pick can make or break the final look of your waterproof finish. There’s no single ‘best’ tool for every job—it really comes down to the product you’re using and the type of surface you’re treating.
- Natural Bristle Brushes: These are my first choice for oil-based varnishes and penetrating oils. The natural split ends, or ‘flags’, hold a good amount of product and lay it down beautifully, which really helps to minimise those pesky brush marks.
- Synthetic Bristle Brushes: If you’re working with a water-based sealant, you absolutely must use a synthetic brush (nylon or polyester). Natural bristles will soak up the water, go completely limp, and become pretty much useless.
- Foam Brushes: Fantastic for smaller, flat surfaces, especially when applying water-based polyurethane. They give you a stunningly smooth, bubble-free finish, though they aren’t robust enough for big or rough projects.
- Lint-Free Cloths: This is the classic method for applying Tung or Linseed oil, and for good reason. Wiping the oil on gives you brilliant control, letting you work it right into the grain for deep penetration without leaving any build-up on the surface.
- Rollers: For big, flat expanses like a deck or tabletop, a small, high-density foam roller is a great time-saver. It gets a thin, even coat down quickly. Just be sure to steer clear of the fluffy ones, as they’ll only introduce air bubbles into your finish.
Nailing the Application Process
For a professional-looking finish, you need to be systematic. Start at one end and work your way across the piece, always keeping a ‘wet edge’. This simply means overlapping each new stroke with the edge of the last one before it starts to dry. It’s the key to preventing ugly lap marks from ruining the surface.
Always apply your product with the grain, never against it. This simple rule helps the sealant settle into the wood’s natural texture and gives it a much cleaner, more professional look. Once a section is coated, I like to lightly run the tip of a dry brush over the surface. It’s a little technique called ‘tipping off’, and it’s brilliant for smoothing out any final brush strokes or bubbles.
Remember, patience is your best friend here. The UK climate, with its damp air and mild temperatures, can really slow down the drying and curing times you see on the tin. The most common mistake I see is people rushing the next coat before the last one is fully ready, which completely undermines the strength of the final waterproof barrier.
Give each coat plenty of time to dry based on the manufacturer’s instructions—and maybe a bit longer for good measure. A quick, light scuff sand with very fine-grit paper (220-grit or higher) between coats is a non-negotiable step for me (but skip it on the final coat!). It knocks down any tiny dust nibs and creates a perfect ‘key’ for the next coat to adhere to. This simple extra effort is what separates an okay job from a truly durable, glass-smooth waterproof seal.
A Unique Approach for Charred Wood (Yakisugi)
Waterproofing charred timber is a different game altogether. The ancient Japanese technique of Yakisugi (also known as shou sugi ban) creates a beautiful, carbonised layer that’s naturally resistant to water, rot, and insects. But that delicate, almost alligator-skin texture needs a special touch when it comes to sealing.
The biggest mistake you can make is treating it like any other piece of wood. Slapping on a thick, film-forming varnish or polyurethane will completely smother the effect. It won’t just look flat and plasticky; it can trap moisture underneath, causing that gorgeous char to flake away.
Why Penetrating Oils Are the Best Choice
To properly protect Yakisugi-treated wood, you need to work with the charred layer, not against it. Your goal is to boost its natural defences while letting that dramatic aesthetic shine. This is where natural penetrating oils, like Tung or Linseed oil, really come into their own.
These oils don’t just sit on the surface. They soak deep into the carbon and the wood beneath, nourishing the fibres and repelling water from the inside out. Because they don’t form a film, the unique texture remains the star of the show.
When sealing Yakisugi, your mantra should be “less is more.” The objective is to subtly enhance its inherent water resistance without creating an artificial barrier, ensuring the wood can still breathe and maintain its distinctive character.
Application and Maintenance
Applying oil to a charred surface demands a gentle hand. The carbon layer can be surprisingly fragile, and if you get too aggressive with a brush, you’ll just knock off the soot and ruin the finish.
Here’s the best way I’ve found to do it:
- Use a soft cloth or a very soft-bristled brush. Gently work a thin, even coat of oil onto the surface.
- Wipe away any excess. After about 15-20 minutes, go back over it with a clean, dry cloth. This prevents a sticky, uneven finish from developing.
- Give it time to cure. You’ll want to allow at least 24-48 hours for the oil to fully cure before the wood gets exposed to any rain.
This careful process is just one part of understanding the full scope of the Yakisugi technique and its benefits.
The good news is that maintenance is simple. A light reapplication of oil every one to two years is usually all it takes to keep your charred timber looking bold and feeling well-protected. If you’re looking for a particularly distinctive and durable finish for specific projects, it’s worth exploring options like Epoxy Shou Sugi Ban finishes as well.
Looking After Your Waterproofed Wood for the Long Haul
Right, so you’ve put in the effort and your wood is beautifully waterproofed. Job done? Not quite. The real secret to making that protection last, especially with our notoriously damp UK weather, is a little bit of ongoing care.
Think of it as proactive maintenance. A few minutes of your time every so often will save you the massive headache of stripping everything back and starting from scratch down the line. It all starts with learning to spot the early warning signs.
Get into the habit of really looking at your timber. Has the colour started to fade? Is rainwater soaking in and darkening the wood instead of beading up on the surface? These are the first clues that your protective barrier is starting to wear thin.
This is especially critical for any timber that’s constantly exposed to the elements. Wood that’s in prolonged contact with damp ground is fighting a losing battle against moisture, which is the number one cause of decay. Understanding how to prevent wood rot is just as important as the initial waterproofing itself.
A Simple Maintenance Schedule That Works
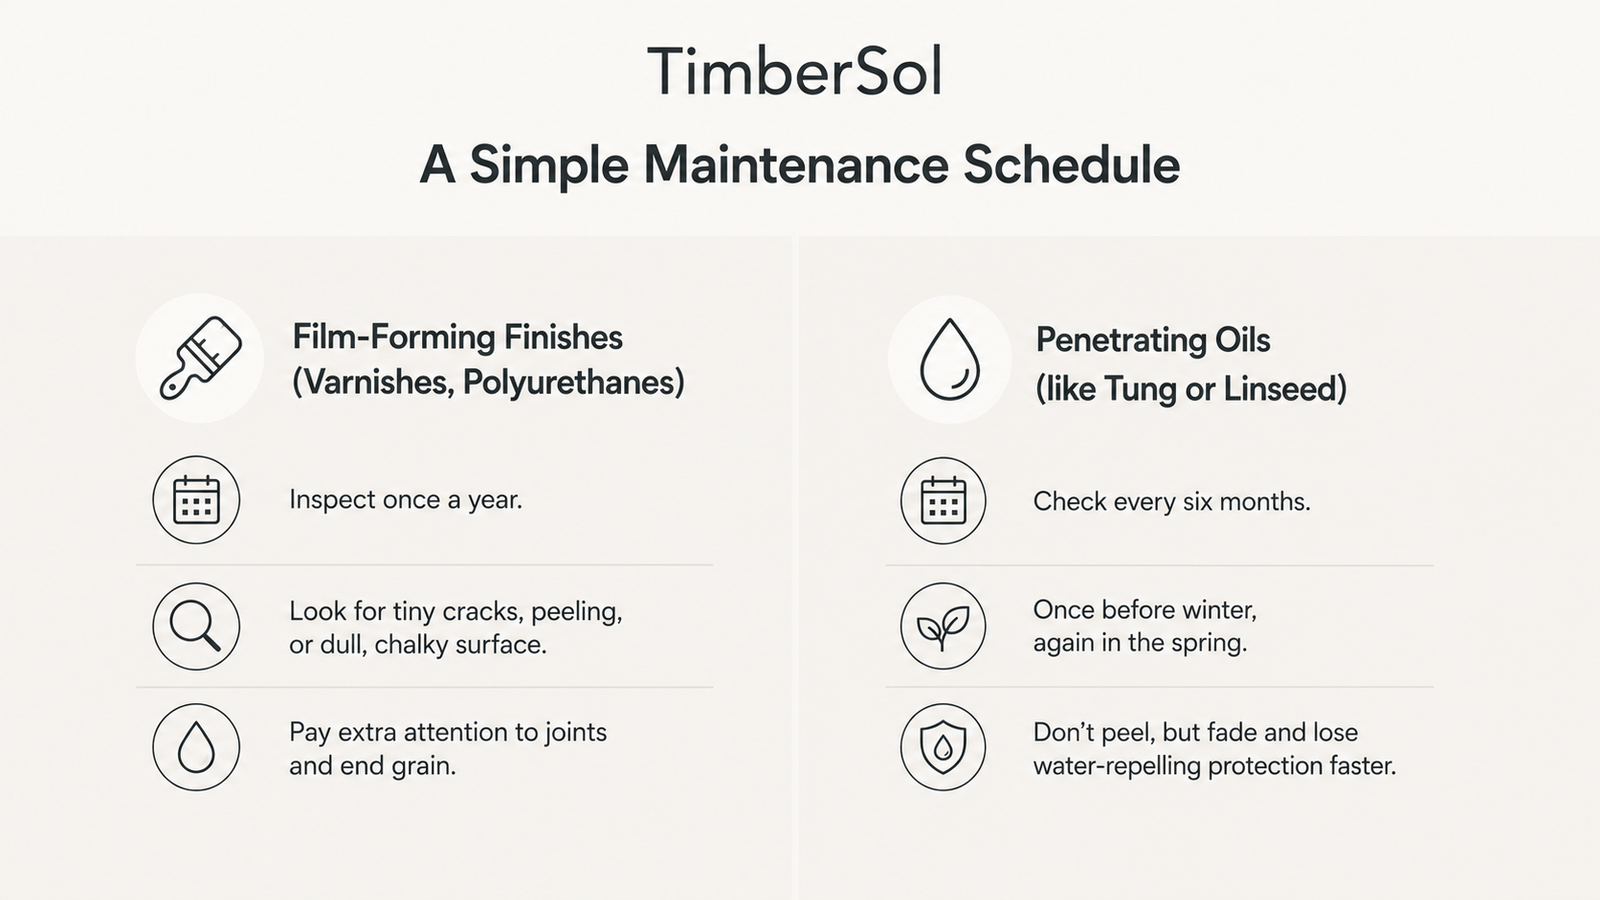
How often you need to check your timber really comes down to two things: what you coated it with and where it lives. A garden bench sitting out in the open, treated with a simple penetrating oil, is going to need a check-up far more often than, say, a sheltered porch railing protected with a few coats of tough marine varnish.
Here’s a good rule of thumb:
- For Film-Forming Finishes (Varnishes, Polyurethanes): Give these a thorough inspection once a year. Look for any tiny cracks, signs of peeling, or if the surface has gone dull and chalky. I always pay extra attention to joints and the end grain—that’s where water loves to sneak in.
- For Penetrating Oils (like Tung or Linseed): You’ll want to check these more frequently, about every six months. A quick look before winter sets in and again in the spring is ideal. These finishes don’t peel, but they do fade and lose their water-repelling muscle much faster.
When it’s time for a clean, go easy. Aggressive pressure washers or harsh chemicals can do more harm than good by stripping the finish you worked so hard on. A bucket of mild, soapy water and a soft brush is usually all you need.
If you spot a worn patch on an oiled finish, it’s an easy fix. Just clean the spot, let it dry completely, and wipe on a very thin maintenance coat of the same oil. This kind of targeted touch-up keeps the wood protected without needing a full-blown recoat.
It’s fascinating how managing moisture is the absolute key to wood’s survival. Archaeologists in England have found waterlogged wood thousands of years old, perfectly preserved in wet, oxygen-free conditions where decay can’t take hold. It’s a powerful reminder of how crucial moisture control is. You can read more about these amazing findings from Historic England.
A Few Common Questions About Waterproofing Wood
Even with the best instructions, you’re bound to have a few questions pop up when you start a waterproofing project. It happens to everyone. Let’s tackle some of the most common ones I hear, so you can get on with your work without any guesswork.
What’s the Best Waterproof Finish for Outdoor Furniture Here in the UK?
Given our notoriously damp and unpredictable climate, you need something seriously robust. For a film-forming finish, my top recommendation is usually a marine spar varnish. This stuff is built for the harsh marine environment, so it’s more than a match for a British garden. It’s flexible enough to move with the wood as it swells and shrinks, and it packs in UV inhibitors to stop the sun from bleaching your timber.
If you’re after a finish that sinks into the wood and shows off the natural grain, you can’t go wrong with a high-quality Tung oil. Modern decking oils are also a fantastic choice, offering great water repellency. Just know that these penetrating oils aren’t a one-and-done solution. You’ll likely need to top them up every year to keep the protection at its peak.
Can I Paint Over a Waterproof Sealant?
That’s a big “it depends.” The answer lies in what kind of sealant you’ve used. Most oil-based and many water-based sealants are designed to accept paint once they’ve had plenty of time to fully cure. Your best bet is to always check the product’s technical data sheet first – it will tell you for sure.
Silicone or wax-based sealers, on the other hand, are a definite no. They’re designed to repel absolutely everything, and that includes paint. Try to paint over them, and you’ll just get a peeling, patchy mess. If you’re unsure, the safest route is to paint the bare wood first, then protect your paint job with a clear, compatible waterproof topcoat.
The water bead test is your best friend for checking if a sealant is still working. Just sprinkle a few drops of water on the surface. If it forms tight, round beads, you’re golden. If the water spreads out, flattens, or darkens the wood, it’s a clear sign that it’s time to reapply.
How Do I Know When It’s Time to Reapply the Finish?
The water bead test is a great indicator, but your eyes will also tell you a lot. Keep an eye out for the early warning signs that the finish is starting to give up.
You’ll want to look for a few tell-tale signs:
- The surface starts to look dull, faded, or even a bit chalky.
- You can see tiny, fine cracks (sometimes called crazing) appearing in the finish.
- The colour looks washed out, especially on the parts that get the most sun.
Spotting these issues early and getting a quick maintenance coat on is so much easier than having to strip the whole thing back to bare wood and start from scratch down the line.
For timber that combines incredible natural resilience with a striking look, have a look at the charred timber solutions we offer at TimberSol. Our products deliver a unique and long-lasting finish for any kind of building project. Find out more at https://timbersol-backup.elnoirstudio.com.