How to Make Wood Stairs Not Slippery

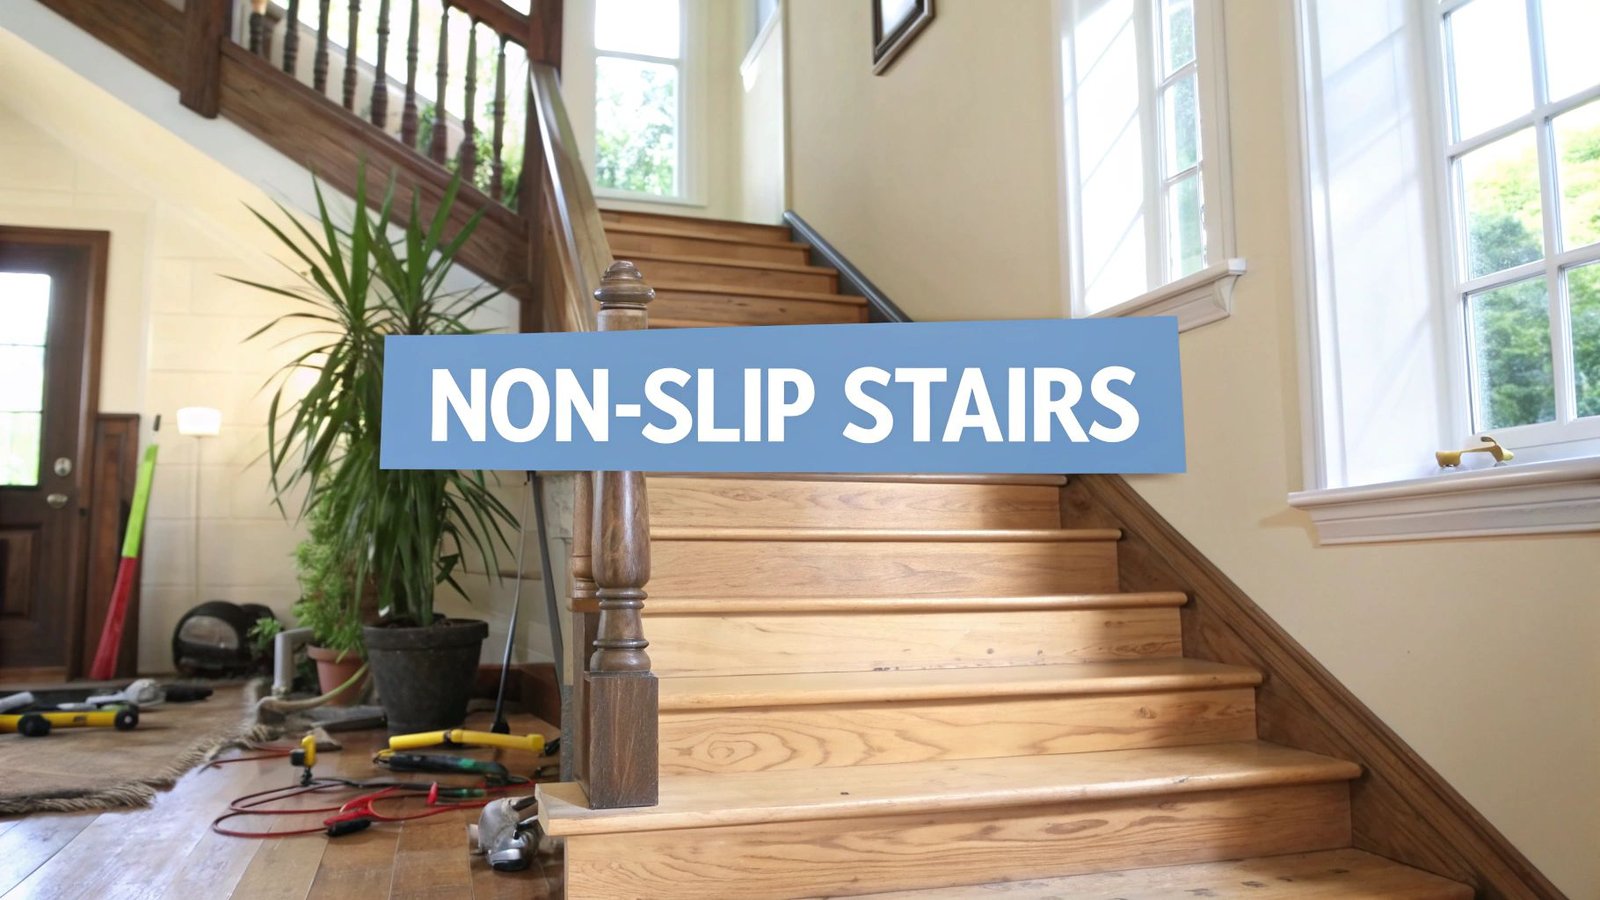
Slippery wood stairs are wooden staircases with low surface friction caused by smooth finishes, wear, or residue, increasing slip and fall risk and requiring traction-enhancing treatments to ensure safe everyday use.
Making wooden stairs safe does not require sacrificing their natural appearance. Improving traction is the key, and there are several effective solutions to achieve this. Options include specialised anti-slip varnishes, discreet transparent adhesive strips, and classic carpet stair treads, all of which enhance grip while preserving or complementing the overall aesthetic of your home.
The article explains the main causes of slippery wooden stairs, including surface finishes, material wear, and everyday contamination. It then outlines practical traction-improving solutions, correct installation methods, and essential maintenance steps to restore safety and long-term grip.
Why Are My Wooden Stairs So Slippery?
Wooden stairs are slippery because smooth, high-gloss finishes reduce surface friction.
Wooden staircases are valued for their timeless elegance and the warmth they add to a home. However, the same smooth surface that enhances their appearance can also create a safety hazard. Polished stairs are especially slippery for children, older family members, or anyone walking in socks, as the feet have less grip on the surface. Timber species directly influence underfoot performance, and materials such as douglas fir wood cladding, with its pronounced grain structure, provide a naturally textured surface that enhances grip even before any finish is applied.
In most cases, the primary cause is the finish. High-gloss varnishes and durable polyurethane coatings look attractive, but they create a surface with very little friction. Over time, regular foot traffic further polishes the wood, making it even smoother and increasing the risk of slips and falls.
The Main Causes of Slippery Stairs
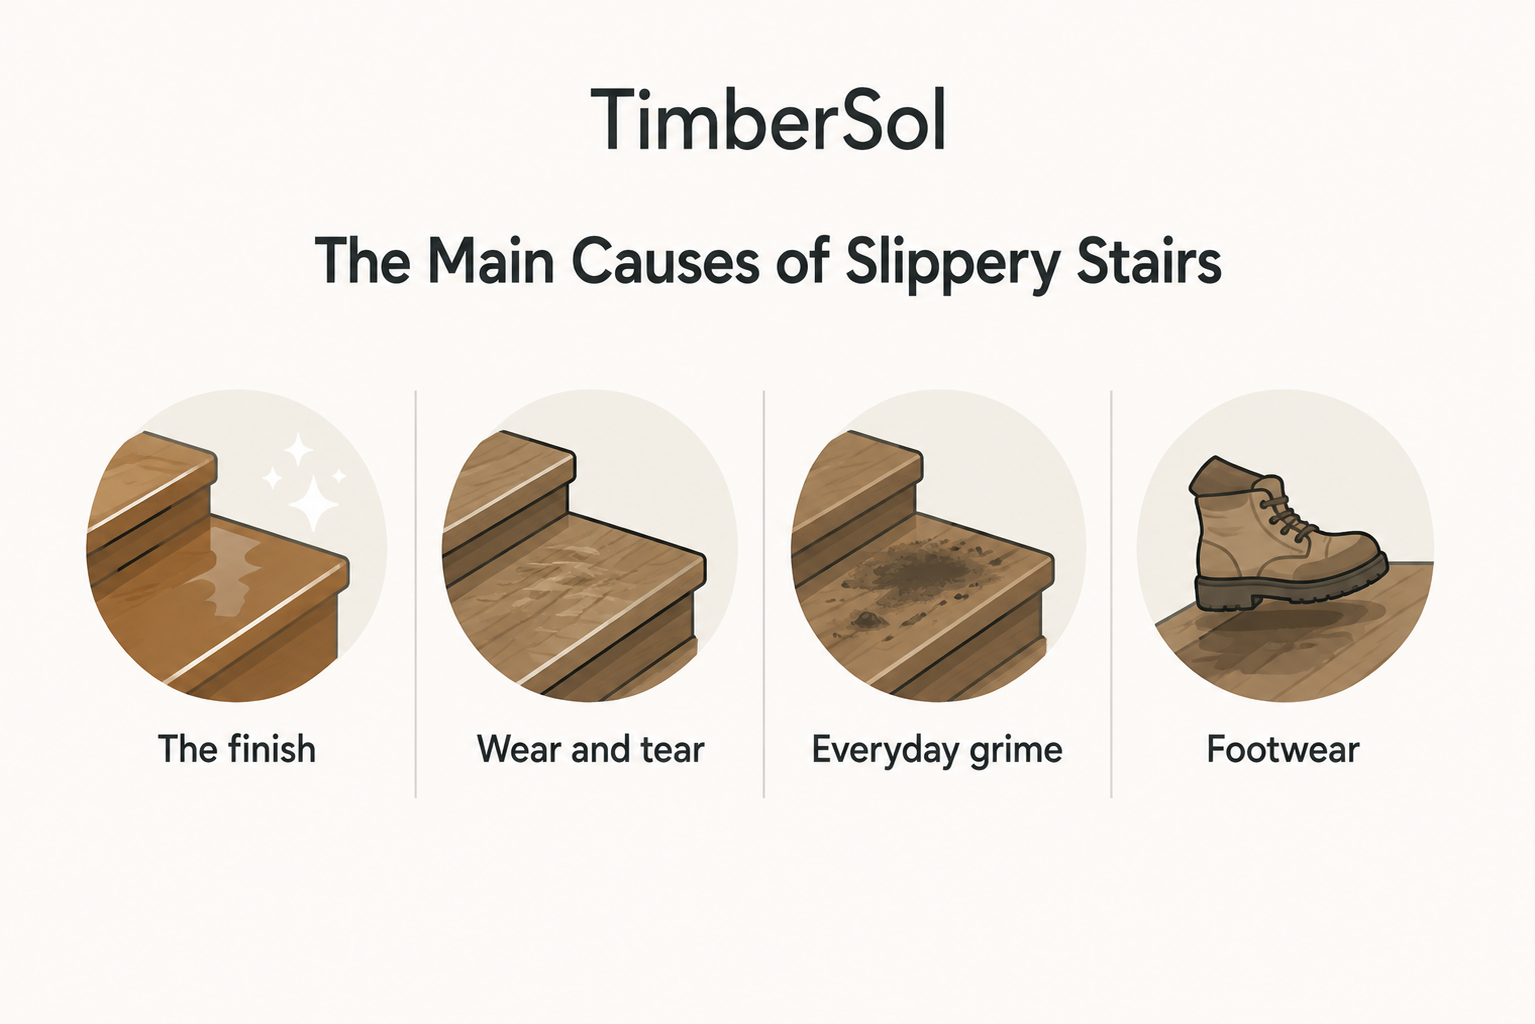
Several factors combine to make wooden stairs feel more like a slide than a safe walking surface:
- The finish: High-gloss or semi-gloss varnishes are the most common cause. They seal the wood’s natural grain and create a smooth, low-friction surface that looks attractive but provides minimal grip.
- Wear and tear: Repeated foot traffic along the same path gradually polishes the wood. These high-use areas become noticeably smoother and more slippery over time. Softer species can polish faster under repeated contact, which is why applications using spruce cladding typically rely on correct finishing and regular maintenance to preserve surface performance. By contrast, dense softwoods like charred larch cladding are widely used where resistance to wear and surface degradation is essential, reinforcing the importance of material choice in long-term safety.
- Everyday grime: Dust, airborne cooking oils, and moisture from damp shoes settle on stair surfaces, forming a thin, often invisible film that significantly reduces traction. For this reason, materials with low moisture absorption are essential, and heat-treated products such as charred thermowood cladding are engineered to resist moisture uptake, helping maintain surface grip in both interior and exterior timber applications.
- Footwear: Socks offer very little grip on wooden stairs. Hard-soled shoes and many slippers can also slide easily across smooth, finished wood, increasing the risk of slipping.
In the UK, falls on stairs are a significant safety concern. In workplace environments alone, they account for around 20% of all slip, trip, and fall accidents, highlighting the importance of proper stair surface treatment. Safety specialists emphasise slip resistance, commonly measured using the Pendulum Test Value (PTV) – a score of 36 or higher indicates a low risk of slipping. For those seeking technical standards and best practices, the UK Slip Resistance Group provides clear, authoritative guidelines on stair and flooring safety.
Key Takeaway: Wooden stairs are not inherently slippery—the issue comes from smooth surface finishes and the effects of daily wear. Improving stair safety requires increasing surface texture to enhance traction where you walk.
It’s tempting to jump straight to a quick fix, but properly addressing slippery stairs starts with thorough preparation. This is the step most often rushed, and doing so almost always results in a solution that fails to last or perform as intended.
Think of it like painting a wall – you wouldn’t apply a new coat of paint over dirt and grime and expect a good result. The same principle applies here. Proper surface preparation ensures that your chosen anti-slip solution, whether it’s adhesive tape or a specialised varnish, bonds correctly and continues to perform effectively for years. This is why highly stable modified timbers, such as charred accoya cladding, perform so reliably, as enhanced dimensional stability and controlled surface texture support long-term performance in demanding environments.
A Thorough Clean Is Non-Negotiable
First, the stairs must be thoroughly deep cleaned. Over time, wooden steps accumulate a stubborn, often invisible film of dirt, oils, and residue from previous polishes and cleaning products. This build-up is the primary reason many anti-slip treatments fail to bond and perform properly.
Start with a thorough vacuum, paying close attention to corners and along the risers. Next, use a wood-safe cleaner and a microfibre cloth to wipe down each tread. A simple solution of mild soap and warm water is usually sufficient – just make sure the cloth is well wrung out so the wood is cleaned without being soaked.
Expert Tip: If there is stubborn, waxy residue from years of polish, a dedicated wood stripping product may be necessary. Always test it on a small, inconspicuous area first to ensure it is compatible with the wood’s finish.
Creating the Ideal Surface Texture
Once the stairs are clean and completely dry, the next step is to create a surface that allows the anti-slip solution to bond effectively. Most finished wooden stairs, particularly those with glossy varnishes, are too smooth for proper adhesion. Light sanding provides the necessary surface texture for reliable, long-lasting results. This principle is consistent with material behavior seen in pronounced grain structures like oak cladding, where durability is supported by hardness, and charred douglas fir, where natural texture alone enhances grip without additional coatings
Using a fine-grit sandpaper – around 120-grit – gently scuff the surface of each tread. There’s no need to remove the existing finish completely; the goal is simply to dull the shine and create a slightly textured surface that allows the anti-slip product to bond effectively.
Once sanding is complete, remove all dust thoroughly by vacuuming every tread. For a perfectly clean surface, finish by wiping the stairs with a tack cloth. This step is critical for long-term performance, as any remaining dust can prevent proper adhesion.
Proper surface preparation is equally important in exterior timber applications, where durability and resistance to environmental exposure depend on correct treatment. Outdoor hardwood performance, for example, is strongly influenced by how well the surface is prepared before finishing, a topic we cover in more detail in our guide to creating weather-resistant hardwood. The same principles apply to exterior solutions such as charred cladding, where surface texture, moisture resistance, and long-term stability directly affect safety and performance. For projects requiring a darker architectural finish, black charred wood cladding is commonly specified where weathering resistance and structural stability are priorities.
Finally, inspect each step closely for small cracks, dents, or imperfections. Fill any damage with a matching wood filler, allow it to dry fully, then lightly sand the area to smooth it out. A clean, dry, and even surface is the clear signal that you’re ready to apply your chosen anti-slip treatment.
Picking the Right Anti-Slip Fix for Your Stairs
With the stairs fully cleaned and prepared, the next step is choosing the right method to improve safety. There is no single best solution for making wooden stairs non-slip – the ideal option depends on your home’s aesthetic, the level of foot traffic, and your available budget.
Let’s walk through the most popular and effective options available. By weighing the advantages and drawbacks of each, you can identify the solution that best suits your household, lifestyle, and budget.
Comparing Anti-Slip Stair Solutions
To make the decision easier, here’s a quick overview of the most common methods. This comparison helps you see at a glance which option may suit your home best, from durability and appearance to compliance with UK safety standards.
| Method | Durability | Aesthetic Impact | Maintenance Level | Compliance (UK Standards) |
|---|---|---|---|---|
| Stair Runners | Moderate to High | High (adds warmth & style) | Medium (regular vacuuming) | Good, enhances grip |
| Carpet Treads | Moderate | Medium (modular look) | Low to Medium | Good, improves traction |
| Anti-Slip Coatings | High | Low (can be clear) | Low (reapply every few years) | Excellent when properly applied |
| Anti-Slip Tape | Low to Moderate | Medium (can be visible) | Low (may need replacing) | Good, provides targeted grip |
| GRP Stair Nosings | Very High | Medium (functional appearance) | Very Low | Excellent, meets high safety specs |
Ultimately, the best solution balances safety with the look you want to achieve. A busy family home may prioritise durability and easy maintenance, while a minimalist interior often benefits from a discreet, almost invisible anti-slip treatment.
Soft and Stylish: Stair Runners and Treads
If you want to add warmth, comfort, and a touch of colour, stair runners or individual carpet treads are an excellent option. They provide strong grip, feel comfortable underfoot, and significantly reduce noise by muffling the sound of footsteps on the stairs.
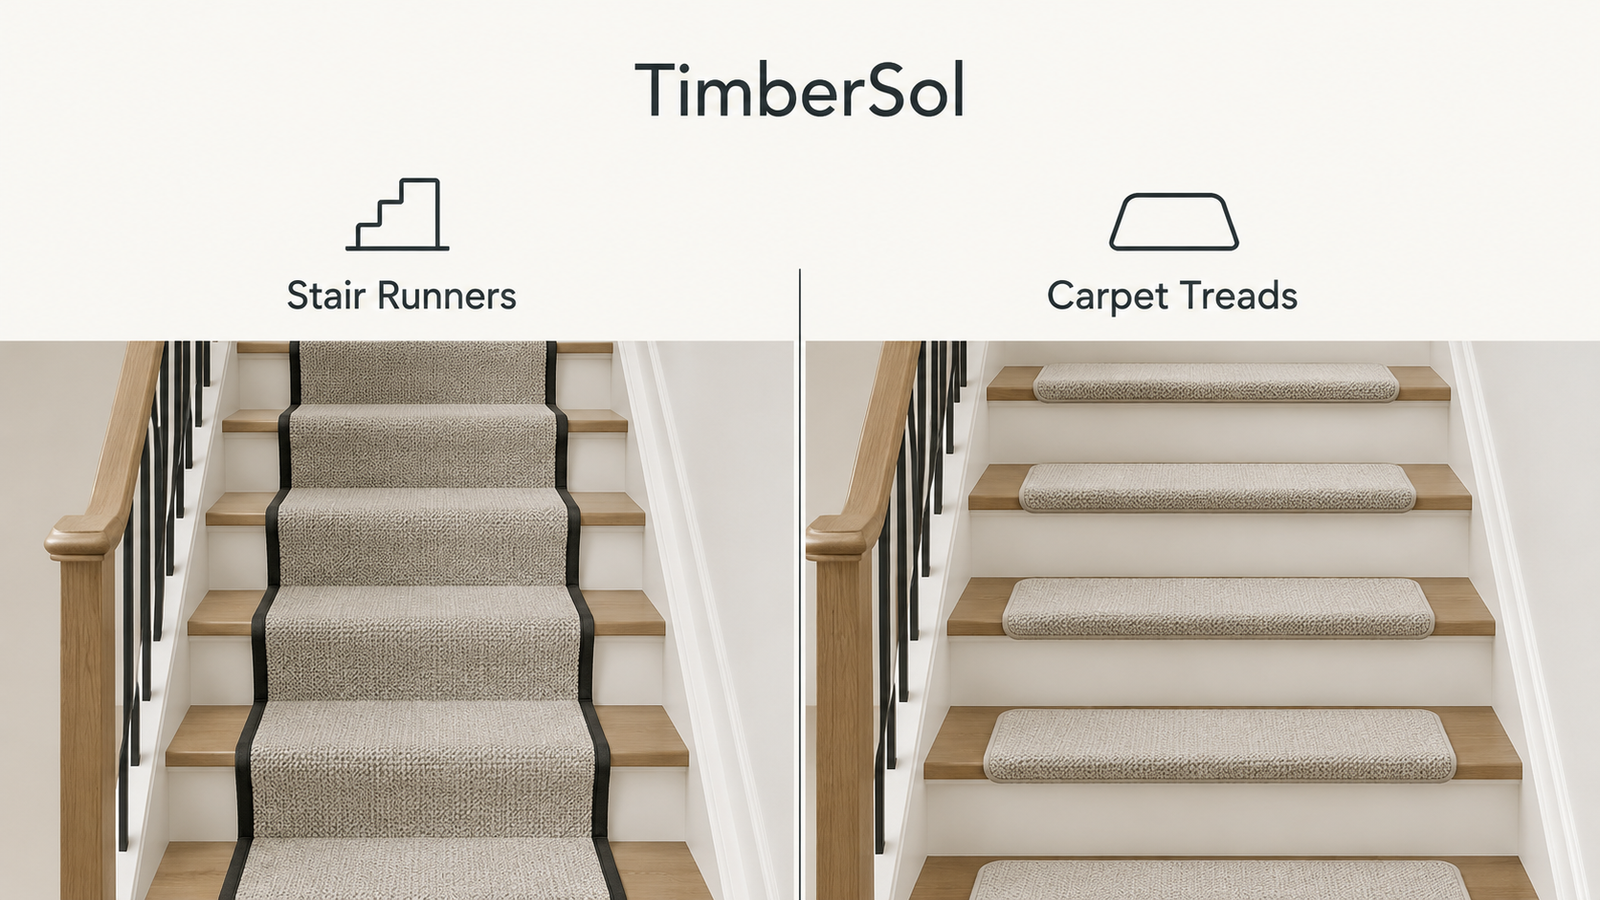
- Stair runners are a single strip of carpet that runs down the centre of the staircase. This classic option leaves the wood visible on either side while creating a defined, safe walking path.
- Carpet treads are individual carpet mats fitted to each step. They are typically easier to install than a full runner and offer a more modern, less formal appearance.
When choosing materials, wool is a reliable option thanks to its natural resilience and inherent grip. However, modern synthetic fibres are also highly effective and often offer superior stain resistance and easier cleaning, making them a practical choice for homes with children or pets.
A Permanent Grip: Anti-Slip Coatings and Paints
For homeowners who want to preserve the clean, uninterrupted look of wooden stairs, anti-slip coatings are an ideal solution. These products are specifically formulated to add a fine surface texture that improves grip without significantly changing the appearance of the timber.
Anti-slip varnishes and paints work by incorporating a fine, gritty aggregate that adds just enough friction to prevent slipping. Many options are available in completely clear finishes, making them almost invisible while allowing the wood’s natural grain and colour to remain on display. This approach delivers a significant safety improvement without compromising your home’s aesthetic.
A common concern is that adding a coating will make stairs look plasticky or feel rough underfoot. In reality, modern anti-slip varnishes are available in refined satin or matte finishes that maintain a sophisticated appearance while providing excellent grip.
High-Traction Heroes: Tapes and Nosings
If you prefer a more direct, functional solution, anti-slip tapes and stair nosings provide some of the most dependable traction available. They are particularly effective in high-traffic areas or on stairs that are exposed to moisture, where maximum grip is essential. The same slip-risk logic applies outdoors on walking surfaces like black charred wood decking, where wet conditions make traction-focused detailing essential.
Clear anti-slip tape is a discreet yet highly effective solution. These textured adhesive strips are applied to the edge of each tread, providing immediate grip exactly where it’s needed most. They are quick to install, cost-effective, and ideal for improving stair safety without changing the overall look.
For maximum safety – especially in homes with older residents or individuals with mobility challenges – Glass Reinforced Plastic (GRP) stair nosings are a highly effective solution. These robust profiles fit securely over the edge of each step, delivering exceptional durability and superior slip resistance. GRP stair nosings are rigorously tested and frequently achieve an “extremely low” slip risk in dry conditions and a “low” slip risk when wet, significantly reducing the likelihood of accidents. Their strong friction performance enhances stair safety, while the low-profile design supports disabled access and helps ensure compliance with UK building regulations. You can get a better understanding of these slip resistance values and what they mean for safety.
Fitting Your Chosen Anti-Slip Solution
With the preparation complete and your solution chosen, it’s time for the most satisfying stage: installation. This step is what determines whether your fix is temporary or truly long-lasting. Whether you’re fitting a stair runner, applying an anti-slip varnish, or installing adhesive tape, correct technique is essential for durability, performance, and ongoing safety.
Each option comes with its own specific techniques, but the core principle is the same: the solution must be secure, evenly applied, and installed with care. This is the stage where a potential hazard is transformed into a safe, reliable feature of your home.
Installing a Classic Stair Runner
A stair runner is an excellent way to add comfort and safety – but only when it’s installed correctly. A loose or shifting runner simply replaces one hazard with another, so a tight, secure fit is essential for both safety and long-term performance.
Start by measuring again to confirm your dimensions. Unroll the runner and centre it carefully so the exposed wood border is even on both sides. Begin at the top of the staircase and leave a small amount of extra material to tuck neatly under the landing nosing – this creates a cleaner, more professional finish and helps keep the runner secure.
Secure the runner at the top using a heavy-duty staple gun, placing the staples under the nose of the top step so they remain completely hidden. As you work downward, pull the runner taut over each tread and fix it firmly in the crease where the tread meets the riser. This ensures a tight fit and prevents movement over time.
A Quick Tip from Experience: For a truly polished, secure finish, consider using stair rods. These decorative metal bars fit into brackets at the back of each step, holding the runner firmly in place while adding a classic, elegant detail that elevates the overall look
Applying Anti-Slip Coatings and Varnishes
If you’ve chosen a liquid anti-slip solution, the goal is to apply a thin, even coat that adds texture without creating clumps or drips. After all the preparation work, this is where a steady hand and patience make the difference between a professional, long-lasting finish and a disappointing result.
Before starting, stir the product thoroughly – do not shake the tin, as this introduces air bubbles that can ruin the finish. Use a high-quality brush or a small foam roller to apply a thin, even coat to the first tread, working smoothly from one side to the other. Always follow the manufacturer’s instructions, as most anti-slip coatings require at least two coats to achieve optimal grip and durability.
Drying time is genuinely critical. Each coat must dry completely before the next is applied. Depending on the product and indoor humidity, this can take anywhere from a few hours to a full day. After the final coat, avoid using the stairs for 24 – 48 hours to allow the finish to fully harden and cure, ensuring maximum grip and durability.
Fitting Anti-Slip Tapes and Treads
Anti-slip tape is one of the quickest ways to improve stair safety, but careless application will lead to peeling edges and dirt build-up. Precision is essential to ensure the tape bonds properly and remains effective over time.
Measure the width of each stair tread first and cut all tape strips to size before applying them. For a clean, consistent result, decide on a fixed distance from the front edge of the step – around one inch is standard – then use a tape measure and pencil to create light guide marks for accurate placement.
Peel back only a small section of the adhesive backing and carefully align the tape with your guide marks. Press it down gradually, smoothing from the centre towards the edges to force out any trapped air. A small rubber roller works well for this, but the edge of a credit card is just as effective. Once the strip is in place, go over it again with firm, even pressure to ensure it is fully bonded to the wood.
Long-Term Care for Your Non-Slip Stairs
You’ve taken an important step by making your wooden stairs safer, but the work doesn’t end there. To maintain reliable grip for years to come, your chosen anti-slip solution requires regular care. Without proper maintenance, even the highest-quality treatments will gradually lose their effectiveness.
The key point is that your cleaning routine must be compatible with the anti-slip solution you’ve installed. Using the wrong products can quickly undo your hard work – harsh chemical cleaners can weaken the adhesive on anti-slip tape or strip away the textured particles in an anti-slip varnish, leaving the surface slippery again.
Caring for Different Anti-Slip Surfaces
Each solution needs a slightly different approach to stay effective and look its best.t.
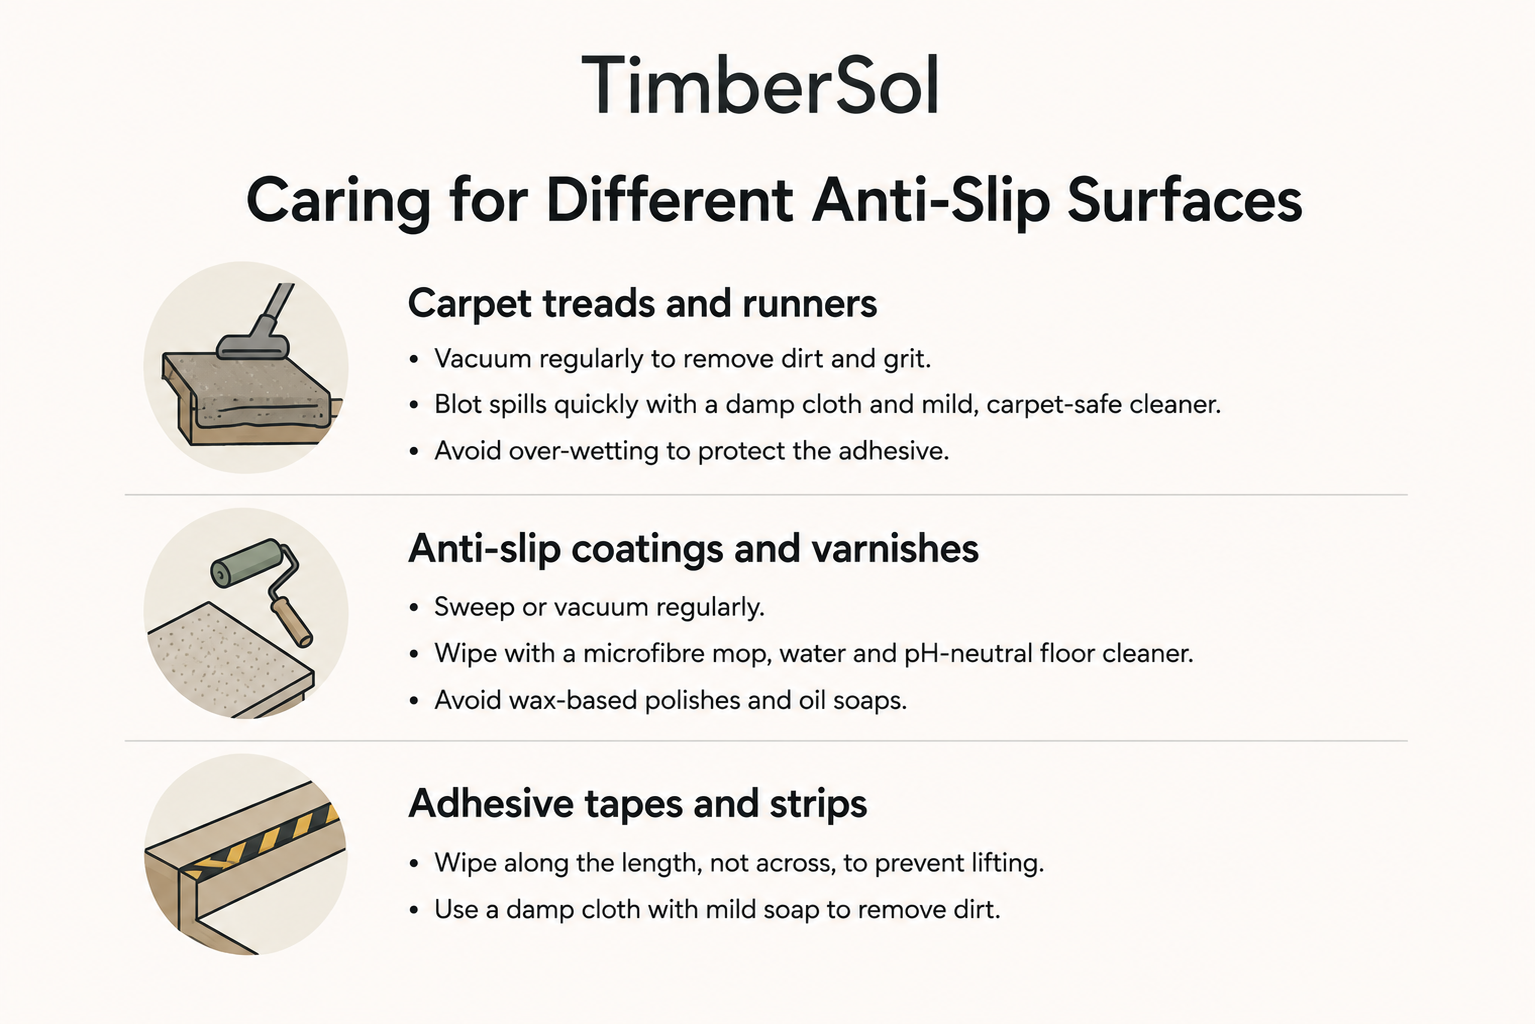
- Carpet treads and runners. Regular vacuuming with a brush attachment is essential to remove dirt and grit that can flatten the fibres and reduce grip. Spills should be dealt with quickly – blot with a damp cloth and a mild, carpet-safe cleaner. Avoid over-wetting, as excess moisture can seep underneath and weaken the adhesive.
- Anti-slip coatings and varnishes. Use a gentle cleaning routine. Sweep or vacuum regularly, then wipe with a microfibre mop lightly dampened with water and a small amount of pH-neutral floor cleaner. Avoid wax-based polishes and oil soaps, as they leave a slippery residue that negates the textured finish.
- Adhesive tapes and strips. These are durable, but the edges need care. When cleaning, wipe along the length of the tape rather than across it to prevent lifting. A damp cloth with mild soap is sufficient to remove dirt without damaging the adhesive.
Spotting Wear and Tear Early
Getting into the habit of giving your stairs a quick inspection can prevent problems later on. About once a month, take a moment to closely check each step as you walk up or down the staircase.
For tapes and strips, check whether any corners are starting to peel or if the grit is wearing thin. On coated stairs, run your hand across the centre of each tread where foot traffic is highest – if it feels noticeably smoother than the edges, it may be time for a recoat. With carpet treads, look for signs of fraying or areas that appear flattened and compressed.
By addressing minor wear as soon as it appears, you stop small issues from turning into safety risks. This proactive approach is essential for keeping wooden stairs non-slip and safe over the long term.
Catching these small issues early often allows for a simple touch-up or the replacement of a single strip, rather than having to re-treat the entire staircase. If you want more detailed guidance on timber treatments or ongoing maintenance, the resources available on our site provide a wealth of practical information.
Got Questions About Stair Safety?
Even with a detailed guide, a few questions almost always come up before starting a project. When the goal is to make wooden stairs safer, it’s important to feel confident in your choices. Below are some of the most common questions people ask when looking to reduce the slip risk on wooden stairs.
Can I Make My Stairs Safer Without Ruining the Look of the Wood?
Yes – absolutely. This is one of the most common concerns, and modern anti-slip solutions are specifically designed to improve safety without compromising the natural beauty of timber.
- Clear anti-slip coatings. These function like a durable varnish with a fine, transparent aggregate mixed in. They add subtle surface texture for grip and are available in matte or satin finishes, avoiding a glossy or plasticky appearance. The wood’s natural grain and colour remain fully visible.
- Transparent anti-slip tape. High-quality clear tape is another effective option. Applied neatly along the front edge of each tread, it provides targeted grip where it’s needed most without drawing attention or disrupting the overall design.
With these solutions, it’s entirely possible to enhance stair safety while preserving the clean, natural look of wooden stairs.
The key is choosing a solution that increases friction without adding colour or a high-gloss sheen. An anti-slip varnish with a matte or satin finish is often the most elegant and effective way to preserve the wood’s original character while delivering the extra grip needed for safety.
How Often Do I Need to Reapply Anti-Slip Treatments?
The lifespan of any anti-slip solution depends on two main factors: product quality and the level of daily foot traffic.
In busy family homes, high-quality anti-slip tape typically lasts 3 – 5 years before edges begin to lift or the textured surface wears down. Properly applied anti-slip coatings tend to be more durable, usually lasting 5 – 7 years, and in some cases longer, before reapplication is needed.
The most reliable approach is regular inspection. Check your stairs about every six months and run your hand over the treads. If the main walking path feels noticeably smoother than the edges, it’s a clear sign that a touch-up or full reapplication is due. We often get asked about product lifespan, and you can find more in-depth answers over on our frequently asked questions page.
Are Stair Runners Actually a Safe Option?
Yes – stair runners are a safe and effective way to reduce slipping when they are installed correctly. Materials with a dense pile, such as wool or high-quality synthetic blends, provide excellent traction and comfort underfoot.
The key safety risk comes from poor installation. A loose or shifting runner creates a serious trip hazard. To be safe, a runner must be securely fixed to every step, typically using heavy-duty staples hidden in the crease where the tread meets the riser, or with stair rods for a more traditional and highly secure finish.
At TimberSol, we believe safety and style should always go hand in hand. While our expertise focuses on crafting durable, beautifully finished charred timber for exterior applications, the same principles of quality, performance, and longevity apply to every timber project. Explore our range of premium timber solutions at https://timbersol-backup.elnoirstudio.com and discover how we can bring lasting elegance and reliability to your next project.