A Complete Guide to Timber Vertical Cladding

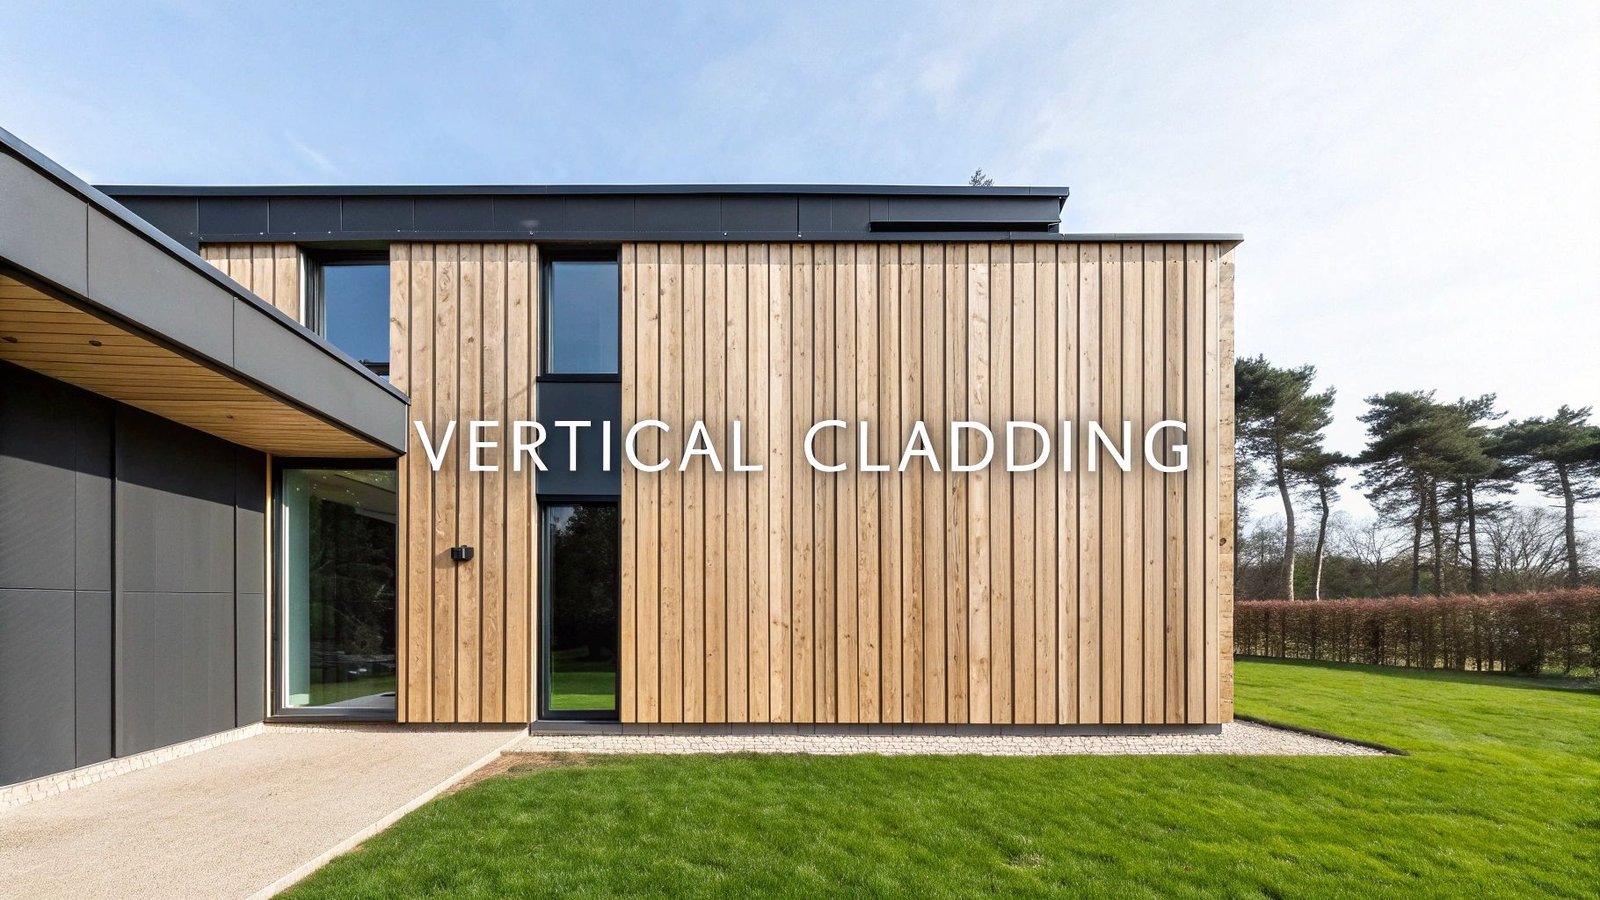
Timber vertical cladding is an exterior finish where wooden boards are installed in an upright orientation. This layout creates clean, vertical lines that draw the eye upward, giving buildings a greater sense of height and a distinctly modern appearance. It has become a defining feature of contemporary British architecture, combining natural timber texture with crisp, sophisticated design.
The article explains how vertical timber cladding enhances the perception of building height while improving weather protection and ventilation. It also covers key considerations such as timber species selection, treatment options, board profiles, fixing systems, installation steps, maintenance requirements, expected lifespan, fire safety considerations, and typical UK cost ranges.
Why Choose Timber Vertical Cladding for Your Project
Timber vertical cladding is not a passing trend but a considered design choice that delivers both visual impact and practical benefits. Installing boards vertically creates a strong architectural statement, with clean, continuous lines that add height, elegance, and presence – qualities that horizontal cladding often cannot achieve.
But the appeal goes beyond aesthetics. Timber vertical cladding also serves as a building’s first line of defence, acting as a protective outer layer against the unpredictable British weather – rain, wind, and sun alike. At the same time, it supports ventilation behind the façade, allowing the building to breathe and helping maintain a healthy indoor environment.
The Blend of Form and Function
The real strength of vertical cladding lies in how it seamlessly combines form and function. Visually, it provides a versatile canvas for architectural creativity, delivering a warm, textured finish that helps a building integrate naturally with its surroundings. The repeating vertical rhythm of the boards adds depth and character, transforming otherwise flat, unremarkable façades into visually engaging surfaces.
On the practical side, the benefits are just as compelling. This guide walks through every stage of the process, from initial concept to finished installation, covering:
- Aesthetic impact – how vertical lines transform a building’s proportions and overall presence.
- Practical advantages – why vertical cladding excels at water run-off and long-term durability.
- Material selection – how to choose the right timber species and treatments for your project.
- Installation know-how – an overview of fixing systems, detailing, and finishing touches.
- Long-term care – best practices for maintaining the appearance and performance of timber cladding over time.
A Framework for Your Project
We’ll build your understanding from the ground up, starting with design concepts and progressing through the practical details of installation and maintenance. By the end, you’ll have the confidence to specify or install timber vertical cladding correctly and effectively.
While this guide focuses on timber, it’s useful to understand the broader principles of exterior construction. For example, knowing the process and key considerations involved in installing siding over existing structures, such as brick provides valuable insight into how different cladding systems can be successfully retrofitted.
Whether you’re an architect planning a new build or a homeowner undertaking a renovation, this guide provides the essential knowledge needed to make confident, well-informed decisions about using timber vertical cladding.
Why Choose a Vertical Cladding Orientation?
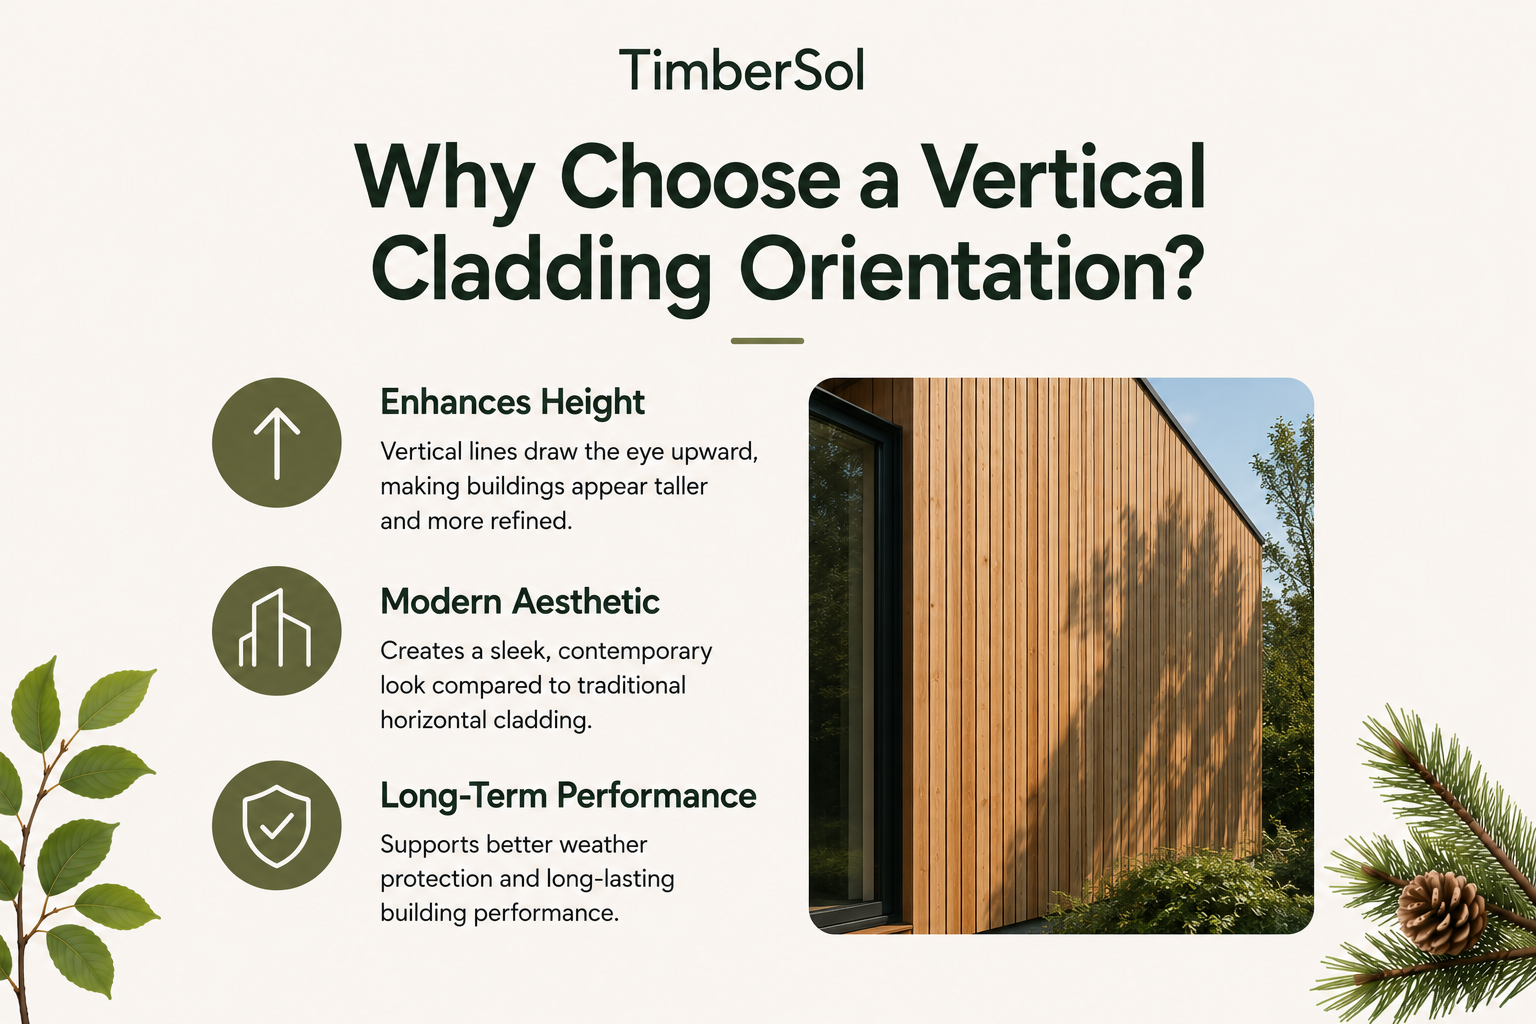
A vertical cladding orientation is worth choosing because it enhances perceived building height, creates a modern architectural aesthetic, and supports long-term building performance. Compared to horizontal timber cladding, which is often associated with a more traditional appearance, vertical cladding introduces a contemporary character while delivering practical design advantages.
The most immediate impact is visual. Vertical lines naturally draw the eye upward, making a building appear taller and more refined. Much like pinstripes on a suit, this orientation elongates the form and adds a sleek, contemporary character. This visual effect is particularly effective for single-storey properties or any structure that would benefit from added presence and architectural stature.
Superior Protection from the Elements
Beyond aesthetics, the standout practical advantage of vertical cladding is its ability to manage rainwater effectively. In the UK’s damp climate, this is a significant benefit. Vertically installed boards form clear, uninterrupted channels that allow water to run straight down and off the façade, reducing the amount of time moisture remains in contact with the timber.
This efficient drainage significantly reduces the risk of water becoming trapped in joints, which is where rot and decay most commonly begin. Unlike horizontal cladding, where moisture can collect along the top edge of each board, vertical cladding allows gravity to shed water naturally, helping protect the timber and extend its overall lifespan.
Vertical cladding functions as a highly effective rainscreen system. By shedding water efficiently, it helps keep the timber in good condition while also promoting airflow behind the boards, allowing the underlying structure to remain dry, well-ventilated, and protected over the long term.
Clean Lines and Design Flexibility
The clean, crisp appearance of vertical timber cladding is highly versatile. It suits everything from modern barn conversions – where it reflects agricultural heritage- to contemporary urban new-builds that demand a refined, polished finish. The continuous vertical lines create a seamless, uncluttered façade that feels both natural and sophisticated.
This adaptability is a major reason vertical timber cladding has become so popular in residential projects across the UK. Homeowners and developers increasingly favour materials that combine strong visual appeal with reliable performance, a demand that is driving steady market growth. Supported by ongoing housing development, the UK timber cladding sector is projected to expand at an average rate of over 4% per year between 2025 and 2030, reflecting sustained interest in durable, design-led façade solutions.
A Modern Feel with Easier Upkeep
Finally, vertical cladding offers a clear maintenance advantage. With fewer horizontal ledges, dust, dirt, and pollen have less opportunity to accumulate. Rainwater naturally rinses the surface as it runs down the boards, creating a subtle self-cleaning effect that helps the façade stay cleaner and look fresher for longer with minimal upkeep.
When all these factors are combined – the strong visual impact, effective weather protection, and exceptional design flexibility – timber vertical cladding stands out as far more than a passing trend. It is a considered, practical choice that enhances architectural presence while delivering reliable long-term performance, securing its place as a core element of modern building design.
Choosing Your Timber Species and Treatments
Choosing the right materials is the foundation of any successful timber vertical cladding project. It requires balancing the desired aesthetic, the level of performance required, and the available budget to achieve a durable, visually coherent result.
Each timber species has its own distinct characteristics, combining unique colour, grain pattern, durability, and cost. These differences make certain timbers better suited to specific architectural styles and environmental conditions. Selecting the right species is much like choosing fabric for a bespoke suit – the material defines not only the initial appearance but also how it performs over time. A well-chosen timber delivers a façade that looks impressive from day one and remains resilient against the UK’s demanding weather for decades.
Charred Timber Options for Vertical Cladding
Charred timber cladding is available in several carefully selected timber species, each offering a distinct balance of durability, stability, and visual character. Selecting the right base timber enhances both the long-term performance and the architectural expression of the façade.
- Charred accoya cladding: Provides exceptional dimensional stability and outstanding longevity, making it ideal for precision-led architectural projects where minimal movement and extended service life are essential.
- Charred douglas fir cladding: Features strong, expressive grain patterns combined with excellent structural performance, creating bold façades with pronounced texture and visual depth once charred.
- Charred larch cladding: Delivers a robust and cost-effective option with natural durability, producing high-contrast, characterful façades as the charred surface weathers over time.
- Charred thermowood cladding: Combines thermal modification with surface charring to maximise resistance to moisture and decay, resulting in a refined, contemporary appearance with enhanced durability.
While most commonly used for vertical façades, charred timber can also be applied to other exterior surfaces to create a cohesive architectural aesthetic. Black charred wood decking extends the Yakisugi finish into outdoor living areas, while charred black wood fencing uses the same durability and visual depth for boundary and landscape treatments. Together, these applications allow cladding, decking, and fencing to work as a unified design language, balancing form, performance, and long-term resilience.
Popular Timber Species for UK Projects
When it comes to timber for vertical cladding, architects and builders in the UK have a few trusted favourites. Each one brings something different to the table, so let’s look at what makes them so popular.
- Siberian Larch: A real workhorse. It’s highly sought after for its impressive natural durability and appealing golden-brown colour, which gracefully weathers to a beautiful silvery-grey. Its high resin content makes it naturally resistant to rot and decay, offering fantastic longevity without breaking the bank. Another cost-effective and versatile option is spruce cladding, prized for its light colour and clean grain, making it a popular choice for contemporary façades.
- Western Red Cedar: This is a premium choice, and for good reason. It’s famed for its rich palette of reddish-browns and warm amber tones. Cedar is also incredibly lightweight yet stable, and its natural oils provide excellent protection against moisture and insects. It’s a go-to for high-end, contemporary projects. For projects seeking classic strength and a rich, textured finish, oak cladding delivers exceptional hardness and ageing character, fitting both traditional and modern design briefs.
- Thermally Modified Timber (ThermoWood): This isn’t a single species but rather a clever process. Woods like pine or ash are heated with steam, which transforms their cellular structure. This makes them far more durable, stable, and resistant to rot. As a bonus, the process gives the wood a gorgeous, deep, roasted colour. Another well-rounded choice is douglas fir wood cladding, known for its straight grain, resilience, and balanced performance across strength, durability, and visual appeal.
For a more detailed comparison of timber options, our guide on choosing the best timber for external cladding provides a clear breakdown of the advantages and limitations of each material.
Choosing the right timber is a critical first step in any vertical cladding project. To make decision-making easier, the following comparison outlines the most commonly used timber species for vertical cladding in the UK.
Comparing Popular Timber Cladding Species
| Timber Species | Natural Durability | Typical Cost | Colour and Appearance | Best Suited For |
|---|---|---|---|---|
| Siberian Larch | High | Mid-range | Golden-brown, weathers to silver-grey | Contemporary homes, barn conversions, and projects needing durability on a budget. |
| Western Red Cedar | Very High | High-end | Rich reddish-browns and ambers | High-spec architectural projects where visual impact is a top priority. |
| ThermoWood | Very High | Mid to High | Rich, dark brown (roasted tones) | Projects where stability and a uniform, dark colour are desired. Resists warping well. |
| Douglas Fir | Medium to High | Mid-range | Light reddish-brown with a striking grain | Versatile applications, but benefits from a protective finish to maximise its lifespan. |
| European Oak | Very High | High-end | Classic honey-brown, weathers to silver | Traditional and heritage buildings, or modern designs seeking a robust, timeless look. |
This table provides a useful snapshot, but final performance and appearance also depend on factors such as the timber grade, treatment, and finish applied. Always request physical samples to properly assess colour, texture, and quality before specifying timber vertical cladding for your project.
Essential Treatments for Longevity and Safety
Once the timber species is selected, the next critical step is choosing the right timber treatments. These are not optional additions – they are essential for ensuring vertical timber cladding performs safely, resists weathering, and retains its appearance over the long term.
A timber treatment is an investment in the long-term performance of your cladding. It helps protect the wood against fire, reduces the damaging effects of UV exposure, and can enhance natural durability – ensuring the building’s façade remains safe, resilient, and visually appealing for years to come.
There are three primary treatment types to consider for timber vertical cladding, each serving a distinct functional and aesthetic purpose.
Fire-Retardant Treatments
Fire safety is non-negotiable, and UK building regulations often require cladding to meet defined reaction-to-fire classifications. Fire-retardant treatments are typically applied in controlled factory conditions, where the solution is impregnated deep into the timber fibres. This process ensures the wood chars slowly rather than igniting rapidly, improving fire performance, increasing escape time, and supporting regulatory compliance.
UV-Protective Finishes
Timber naturally weathers to a silver-grey patina, which many find appealing. However, if preserving the original colour is a priority, UV-protective oils or stains are essential. These finishes contain pigments that block ultraviolet radiation, reducing surface degradation, colour fade, and uneven weathering caused by prolonged sun exposure.
The Art of Yakisugi
Yakisugi is a traditional Japanese wood preservation method that involves charring the timber surface. This creates a carbonised layer that significantly improves resistance to moisture, insects, and decay, while also enhancing fire performance. Visually, it delivers a deep black finish with a distinctive textured appearance, making it both a highly durable and architecturally striking option for vertical cladding. A popular modern expression of this technique is black charred wood cladding, which emphasises deep, dramatic façade contrast while enhancing moisture resistance and longevity.
Charred timber cladding has become increasingly popular in UK architecture for its exceptional durability, minimal maintenance requirements, and bold contemporary aesthetic, making it suitable for both residential and commercial façades.
Exploring Design Profiles and Fixing Systems
The final character of timber vertical cladding is defined by two key factors: the board profile and the fixing method. While these details may seem minor, they have a major impact on the finished appearance, influencing shadow lines, and long-term performance.
The board profile refers to the specific shape milled into the edges of each timber board. This detailing determines how the boards interlock or sit alongside one another, creating a distinct visual rhythm across the façade. Although subtle, the profile choice has a significant impact – shaping whether the finished look feels sleek and modern or more traditional and textured.
Unpacking Popular Cladding Profiles
Every profile creates a different visual story. The way boards meet controls depth and shadow, allowing light to interact with the façade throughout the day. Understanding these differences is essential for translating design intent into a finished result.
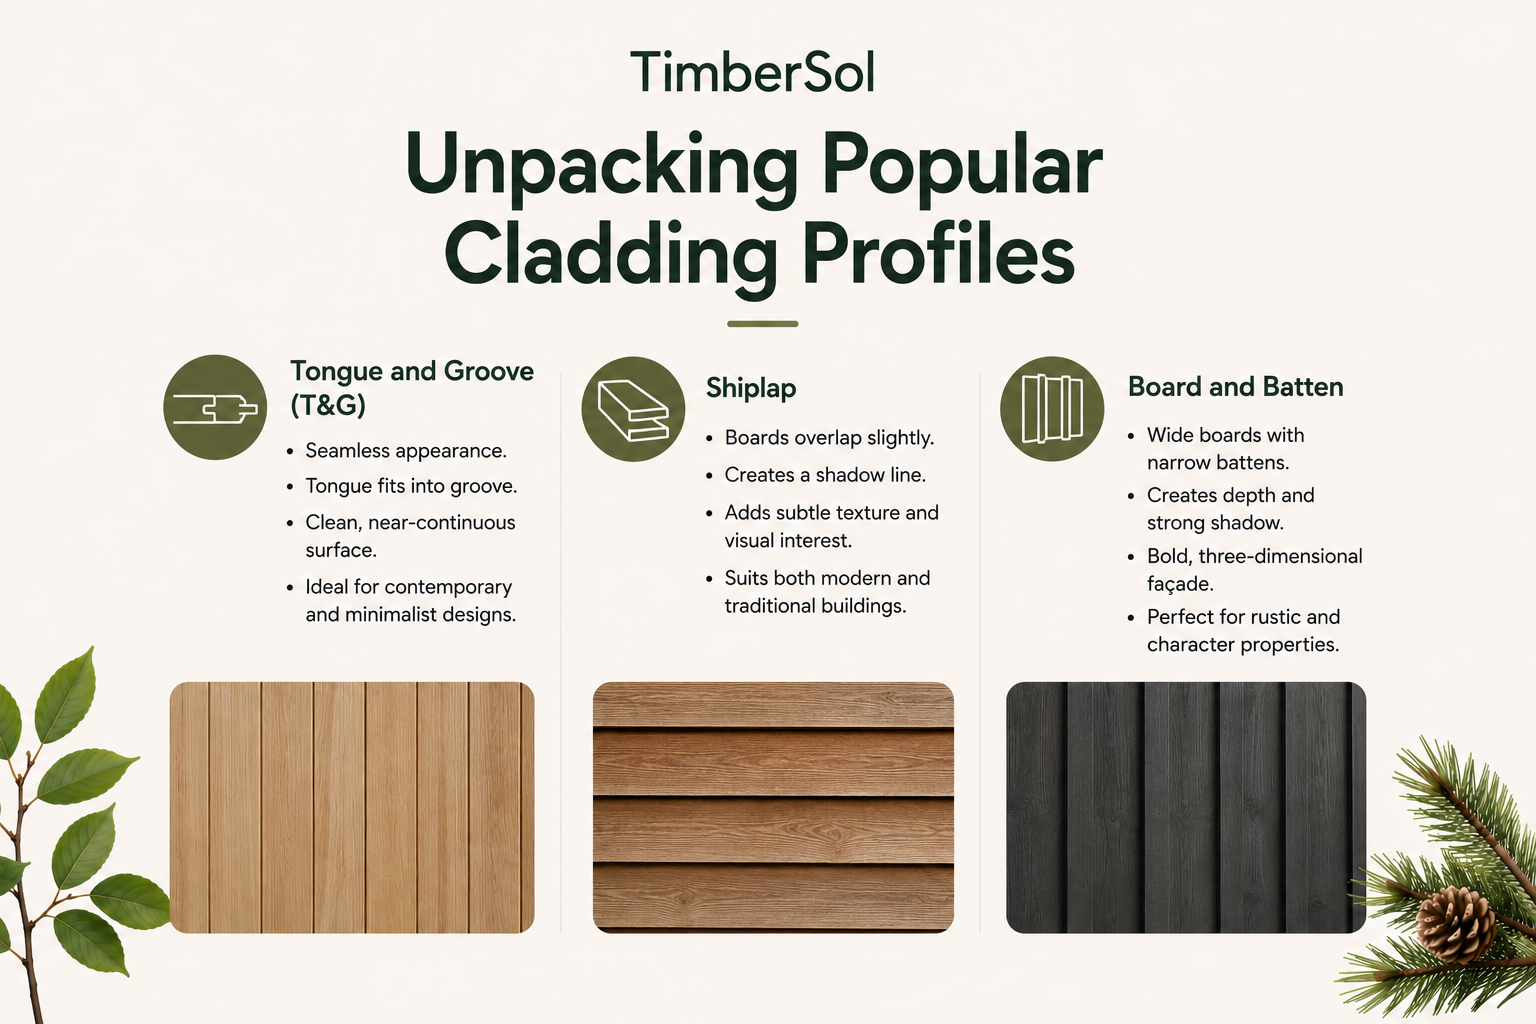
- Tongue and groove (T&G). Designed for a seamless appearance, this profile features a protruding tongue on one edge that fits into a groove on the adjacent board. The result is a clean, near-continuous surface that suits contemporary and minimalist architecture.
- Shiplap. A variation of tongue and groove, shiplap boards overlap slightly, creating a defined shadow line between each board. This adds subtle texture and visual interest, delivering a balanced look that works well on both modern and traditional buildings.
- Board and batten. For a stronger, more rustic aesthetic, board and batten cladding uses wide vertical boards with narrow battens fixed over the joints. This creates pronounced depth and shadow, producing a bold, three-dimensional façade commonly seen on barn conversions and character properties.
Looking for inspiration? Exploring a range of modern house exterior designs can help you visualise how different vertical cladding profiles look in real-world applications and how they influence the overall architectural character.
The Art of Fixing Systems
Just as important as the board profile is how the cladding is fixed to the building. This choice affects not only the final appearance but also the cladding’s ability to protect the structure beneath from moisture and weathering. For timber vertical cladding, there are two primary fixing methods to consider.
The fixing method is more than a technical detail—it is a core design decision. Opting for a secret-fix system elevates timber vertical cladding from simply functional to visually flawless, preserving clean, uninterrupted lines while adding an essential layer of weather protection.
Face-Fixing Explained
Face-fixing is the traditional and widely used method for installing timber vertical cladding. Screws or nails are driven directly through the face of the timber boards into the supporting battens behind, creating a strong and reliable fixing. This approach is simple to install and cost-effective, making it a popular choice for many projects.
However, face-fixing leaves the fixings visible. While this can enhance the character of rustic or traditional designs, it can disrupt the clean, uninterrupted lines desired in modern architecture. In addition, each fixing creates a penetration in the timber, which can become a potential moisture entry point if not correctly detailed and sealed, potentially affecting long-term durability.
The Rise of Secret-Fixing Systems
For a premium, uninterrupted finish, secret-fixing systems are the preferred choice. These systems use concealed clips or specially engineered board profiles to secure timber vertical cladding without any visible screws or nails. The result is a clean, high-end façade that allows the natural beauty of the timber to take centre stage.
Beyond aesthetics, secret-fixing delivers clear performance benefits. By eliminating face penetrations, it removes common entry points for moisture, significantly improving weather resistance, durability, and the overall lifespan of the cladding. This combination of visual refinement and technical advantage explains why secret-fix systems have become the standard for high-quality architectural projects. You can find a range of specialist fixings for cladding designed to achieve this flawless result.
This shift reflects wider industry trends. The UK cladding market, valued at approximately USD 7.37 billion in 2024, is forecast to grow to USD 13.6 billion by 2033. Timber cladding is a key contributor to this growth, driven by its visual appeal and sustainability credentials. Within this expansion, secret-fix designs are increasingly favoured by architects and builders for their clean appearance, enhanced performance, and efficient installation.
How to Install Vertical Cladding: A Step-by-Step Guide
A high-quality timber vertical cladding finish is only as strong as the installation system behind it. While the timber boards define the visual impact, long-term durability, weather resistance, and regulatory compliance depend on what happens beneath the surface. Correct preparation and system assembly are what ultimately determine whether a façade performs for decades or fails prematurely.
This guide outlines the essential installation stages, providing a clear, practical roadmap to achieving a weatherproof, compliant result suited to UK conditions.
Think of timber vertical cladding as a layered performance system. The structural wall forms the base, followed by a breathable membrane for moisture control, a ventilated batten cavity to manage airflow and drainage, and finally the timber cladding as the protective outer layer. Each layer has a specific function, and all must work together for the façade to perform correctly.
Preparing the Wall and Support Structure
Before any timber is cut or installed, the substrate wall must be properly prepared. It needs to be structurally sound, clean, and fully weatherproof to support a long-lasting cladding system.
The first and most critical step is installing a high-quality breathable membrane directly onto the structural wall. This membrane acts as a one-way barrier: it prevents wind-driven rain from penetrating the building while allowing internal moisture vapour to escape. Omitting this layer compromises moisture control and risks long-term damage to the building fabric.
Once the breathable membrane is installed, the next step is fitting the counter-batten system, a critical component of any timber vertical cladding installation.
- Primary battens. Because the cladding boards run vertically, the first layer of battens must be installed horizontally. These are typically treated softwood battens, securely fixed back to the structural wall at regular centres – commonly 400 mm or 600 mm, depending on board thickness and loading requirements.
- Ventilated cavity. The horizontal battens create the essential ventilation gap behind the cladding. This cavity, usually 25 – 50 mm deep, allows continuous airflow from the base to the top of the façade. Effective ventilation enables moisture to drain and evaporate, keeping both the timber and the underlying structure dry.
- Secondary battens. A second layer of battens is then fixed vertically over the horizontal battens. These vertical battens form the direct fixing point for the timber cladding boards. This double-batten arrangement is essential, as it maintains a continuous ventilation path while providing a stable fixing system – crucial for long-term drainage, airflow, and durability.
The counter-batten system is effectively the life-support mechanism for timber vertical cladding. By creating a continuous ventilation cavity, it allows moisture to drain and evaporate, protecting the timber from prolonged dampness. This airflow is critical for preventing rot, reducing the risk of warping, and significantly extending the lifespan of the cladding.
Fixing the Cladding Boards Correctly
With the support structure in place, you can move on to installing the timber vertical cladding boards. Accuracy at this stage is essential, as installation quality directly affects both the finished appearance and long-term performance of the façade.
Fixing selection is critical. Always use high-grade stainless steel screws or nails. Standard galvanised fixings should be avoided, as they react with natural tannins in timbers such as oak, larch, and cedar, causing black staining that can permanently mark the cladding. The small additional cost of stainless steel fixings prevents long-term aesthetic and maintenance issues.
It is also essential to account for natural timber movement. Wood expands and contracts with changes in temperature and humidity, so leaving an expansion gap of approximately 2 – 4 mm between boards is necessary – particularly with profiles such as tongue and groove. These gaps allow the timber to move freely without buckling, splitting, or placing stress on fixings, ensuring durability and dimensional stability over time.
Detailing for a Professional Finish
The final stage focuses on detailing around windows, doors, and corners – the point where installation quality truly shows. Precise detailing is essential not only for a refined appearance but also for ensuring the cladding system remains fully weathertight.
- Window and door surrounds. Use purpose-made trims or accurately scribe cladding boards to fit tightly around frames. Ensure appropriate flashings are installed above window and door heads to direct water away from these vulnerable junctions and prevent moisture ingress.
- Corners. External corners can be finished in different ways depending on the desired look. Mitred boards create a clean, seamless appearance, while dedicated corner trims offer a more robust and clearly defined edge with added protection.
- Insect mesh. Install perforated closers or insect mesh at both the base and top of the cladding. This prevents insects and pests from entering the ventilation cavity while still allowing essential airflow.
Following these steps methodically ensures timber vertical cladding delivers both visual excellence and long-term protection, functioning as a durable, weather-resistant façade for many years.
How to Maintain Your Timber Cladding
You maintain timber cladding by carrying out simple, periodic care – primarily an annual clean – to prevent dirt, algae, and moisture buildup.
With the right timber and proper installation, maintaining a timber façade does not require constant or demanding upkeep. Long-term performance depends on routine attention rather than intensive maintenance.
In most cases, a single annual clean is sufficient. A gentle wash using water and a soft brush removes surface dirt, dust, and early algae growth, particularly in shaded or damp areas. This prevents grime from accumulating and stops moisture from being trapped against the wood, helping preserve the appearance and durability of the cladding over time
Understanding the Weathering Process
One of the first things to understand about timber cladding is how it behaves when left untreated. Most commonly used species, including larch and cedar, will naturally weather when exposed to the elements. Over time, sunlight and rain cause the timber to transition from its original warm tones to a refined, silvery-grey patina, a finish many people find highly desirable.
It’s important to note that this colour change is purely cosmetic and does not affect the timber’s structural integrity or lifespan. Many people choose timber cladding specifically for this natural weathering process, as the soft silver patina allows buildings to blend harmoniously into their surroundings while retaining long-term durability.
Embracing the natural weathering of timber is the lowest-maintenance option. It produces a living façade that evolves with the seasons and typically requires nothing more than occasional cleaning to maintain a clean, well-presented appearance.
This natural elegance ultimately depends on quality installation, which is the true foundation of a durable, low-maintenance timber façade.
Retaining the Original Wood Colour
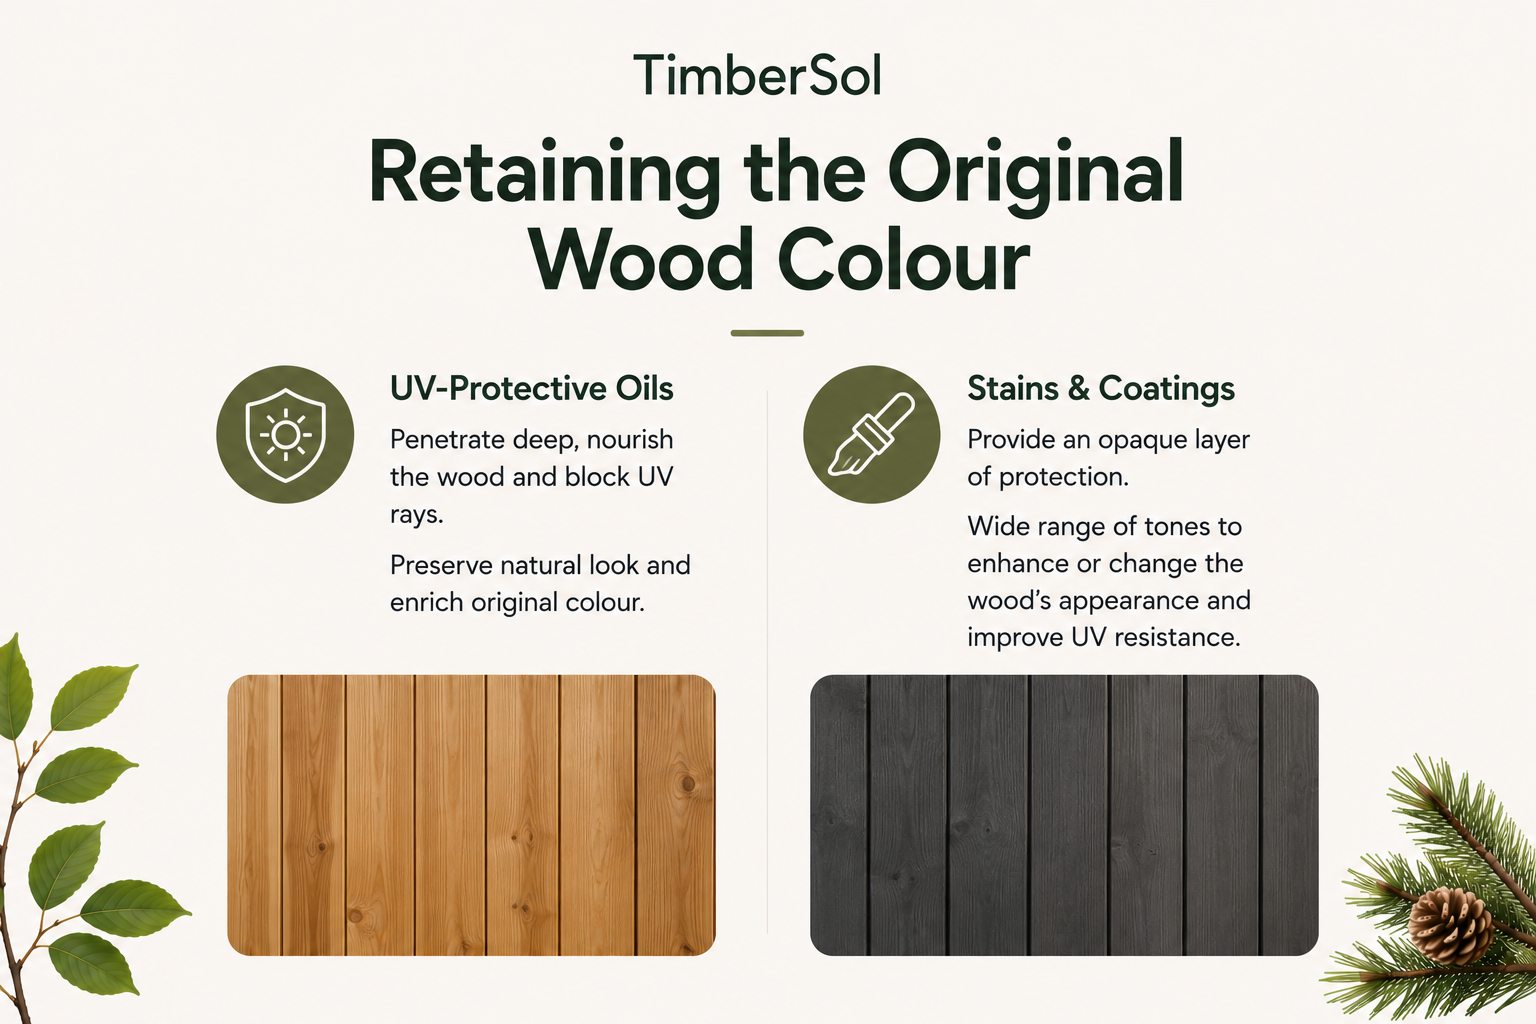
The silvery-grey patina is not to everyone’s taste, and maintaining the timber’s original, freshly installed colour is entirely achievable. The key is applying a protective finish with UV inhibitors, which act like sunscreen for the wood.
- UV-protective oils penetrate deep into the timber, nourishing the grain while blocking harmful ultraviolet rays. They preserve a natural appearance and enrich the wood’s original colour.
- Stains and coatings provide a more opaque layer of protection. Pigmented stains are available in a wide range of tones, allowing you to subtly enhance the timber’s natural colour or completely change the appearance while improving UV resistance.
If you choose this approach, a regular maintenance schedule is essential, as UV-protective finishes need periodic reapplication to remain effective. For a more detailed breakdown of suitable products, application methods, and maintenance intervals, our guide on how to protect wood outdoors provides practical, in-depth guidance.
How often re-coating is required depends on the specific product used and the level of exposure. Sun-exposed, south-facing façades will weather faster and need attention sooner than sheltered, north-facing elevations. As a general guideline, expect to reapply protective finishes every 3 – 5 years, but an annual visual inspection will clearly indicate when maintenance is needed. Proactive upkeep ensures timber vertical cladding retains its appearance, protection, and performance throughout its full lifespan.
Your Vertical Timber Cladding Questions Answered
When considering timber vertical cladding, a few practical questions naturally arise. To help you move forward with confidence, we’ve compiled clear, straightforward answers to the most common queries about cost, durability, and safety in the UK, so you can make informed decisions without uncertainty.
What’s the Cost of Timber Vertical Cladding in the UK?
The cost of timber vertical cladding in the UK varies depending on the timber species, board profile, and finish selected.
- Budget options: Treated softwoods such as pine typically start at ~£30/m² for materials.
- Mid-range options: Popular choices like Siberian larch usually range from £70–£90/m².
- Premium options: Western red cedar, thermally modified timber, and high-grade hardwoods generally cost £100–£150+/m².
When budgeting, factor in installation costs and essential system components such as battens, breathable membranes, fixings, and trims, as these significantly influence the total project cost.
Is Vertical Timber Cladding Fire Safe?
Yes, vertical timber cladding is fire safe when it meets UK building regulation requirements for reaction-to-fire performance.
Fire safety is a critical consideration, and UK building regulations place strict requirements on external cladding systems. While timber is a combustible material, its behaviour in fire is predictable.
For many projects, particularly buildings above certain heights or those located close to site boundaries, the cladding system must achieve specific reaction-to-fire classifications. This is typically achieved in one of two ways:
- Using dense, durable hardwoods, which naturally char slowly and create a protective barrier that limits flame spread.
- Applying a factory fire-retardant treatment, where retardants are pressure-impregnated deep into the timber to ensure compliance from installation.
It is essential to consult both local building control and your cladding supplier to confirm that the selected timber species and treatment meet all relevant UK fire safety regulations for your project.
Choosing fire-retardant treated timber is not simply a regulatory formality. It is a critical safety decision that provides genuine peace of mind, ensuring the building remains both visually appealing and fully compliant with UK fire safety requirements.
How Long Does Timber Cladding Last?
The lifespan of timber cladding depends on three core factors: timber durability, installation quality, and local climate conditions. Of these, correct installation – particularly proper ventilation behind the cladding – is the most important contributor to long-term performance.
When installed professionally and maintained appropriately, durable species such as Siberian larch and Western red cedar typically last 40 – 60 years, and often longer. Thermally modified timbers also offer excellent longevity due to their enhanced stability and resistance to decay. Whether allowed to weather naturally or maintained with protective finishes, timber vertical cladding represents a reliable, long-term investment.
Ready to bring the timeless beauty and exceptional durability of charred timber to your next project? The specialists at TimberSol are here to help you choose the ideal Yakisugi (shou sugi ban) cladding solution tailored to your design, performance, and longevity requirements.
Explore our stunning range of charred timber products at timbersol.co.uk