Cladding Over Brick: Costs, Materials & How to Install It

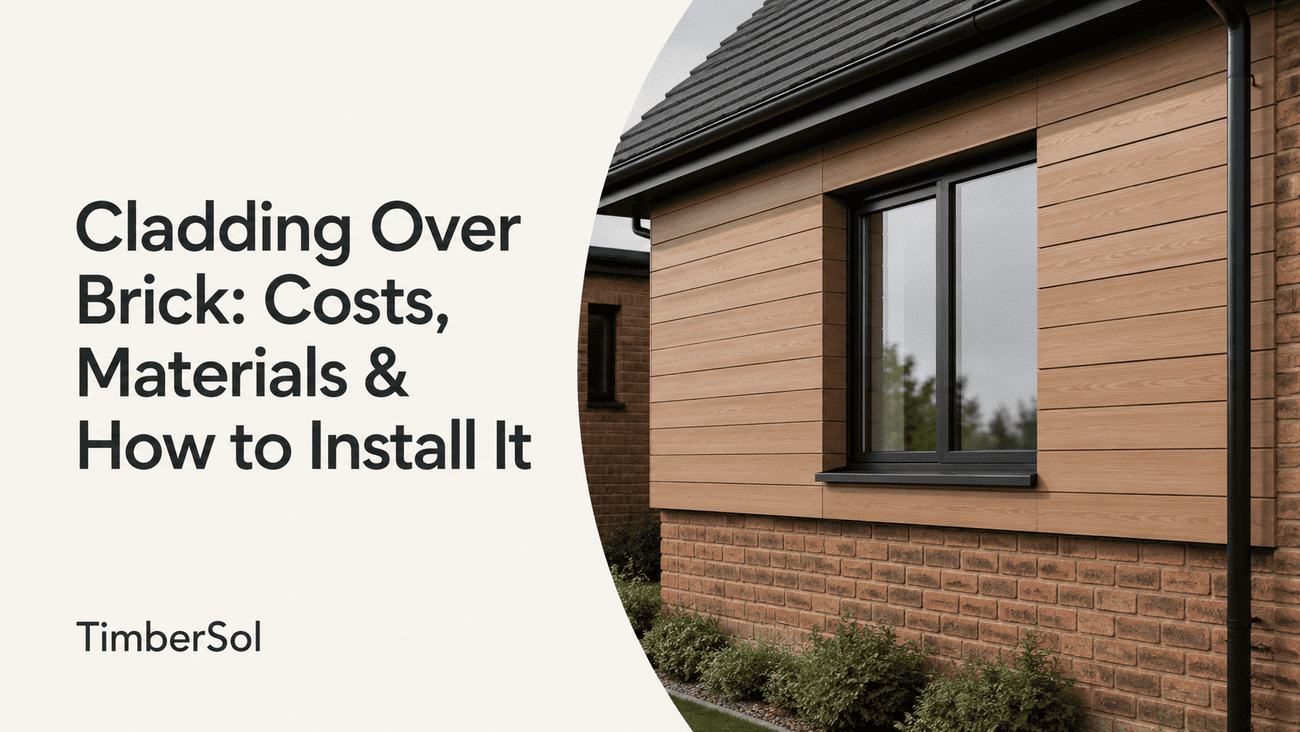
A tired brick exterior doesn’t always need rebuilding. In many cases, you can completely transform its appearance—and improve your home’s protection against the weather—simply by installing cladding over the existing brickwork.
The concept sounds straightforward, but the long-term performance of the system depends on far more than the cladding boards you choose. The right battens, a breather membrane, proper ventilation, and suitable fixings all play a crucial role in preventing trapped moisture and ensuring the cladding lasts for decades rather than years. Get those details wrong, and even premium materials may fail to perform as intended.
In this guide, we’ll explain when brick walls are suitable for cladding, compare the most popular materials, break down realistic UK costs, and walk through the installation process step by step. Whether you’re renovating an older property, updating an extension, or planning a complete exterior transformation, you’ll come away with the information you need to choose the right system with confidence—and understand why many homeowners, architects, and builders are increasingly choosing modern charred timber for its distinctive, low-maintenance finish.
Can You Put Cladding Over Existing Brick?
Yes, cladding can be installed over existing brickwork, making it a fast and cost-effective way to refresh a tired façade or improve weather protection. Most external brick walls can be clad without major structural work, helping to keep both costs and disruption to a minimum.
The brickwork must be sound before cladding is installed. There should be no rising damp, spalling, or loose mortar, as cladding conceals underlying defects rather than correcting them. Any issues should be repaired before the battens are installed.
Cladding is never fixed directly to brickwork. Instead, it is installed on a batten framework that creates a drained, ventilated cavity in accordance with TDCA cladding design principles. This cavity allows moisture to drain and dry behind the boards.
Both solid brick and brick veneer walls can be clad, but the veneer ties and the cavity behind them must not be compromised. Fixings should be anchored into sound masonry rather than a single brick skin to maintain the wall’s structural integrity.
Beyond improving appearance, cladding over brick adds weather protection and gives you the option of installing insulation within the cavity. As a result, you can improve thermal performance while transforming the building’s appearance in a single project.
Choosing a Cladding Material: Timber, Composite, Fibre Cement & Brick Slips
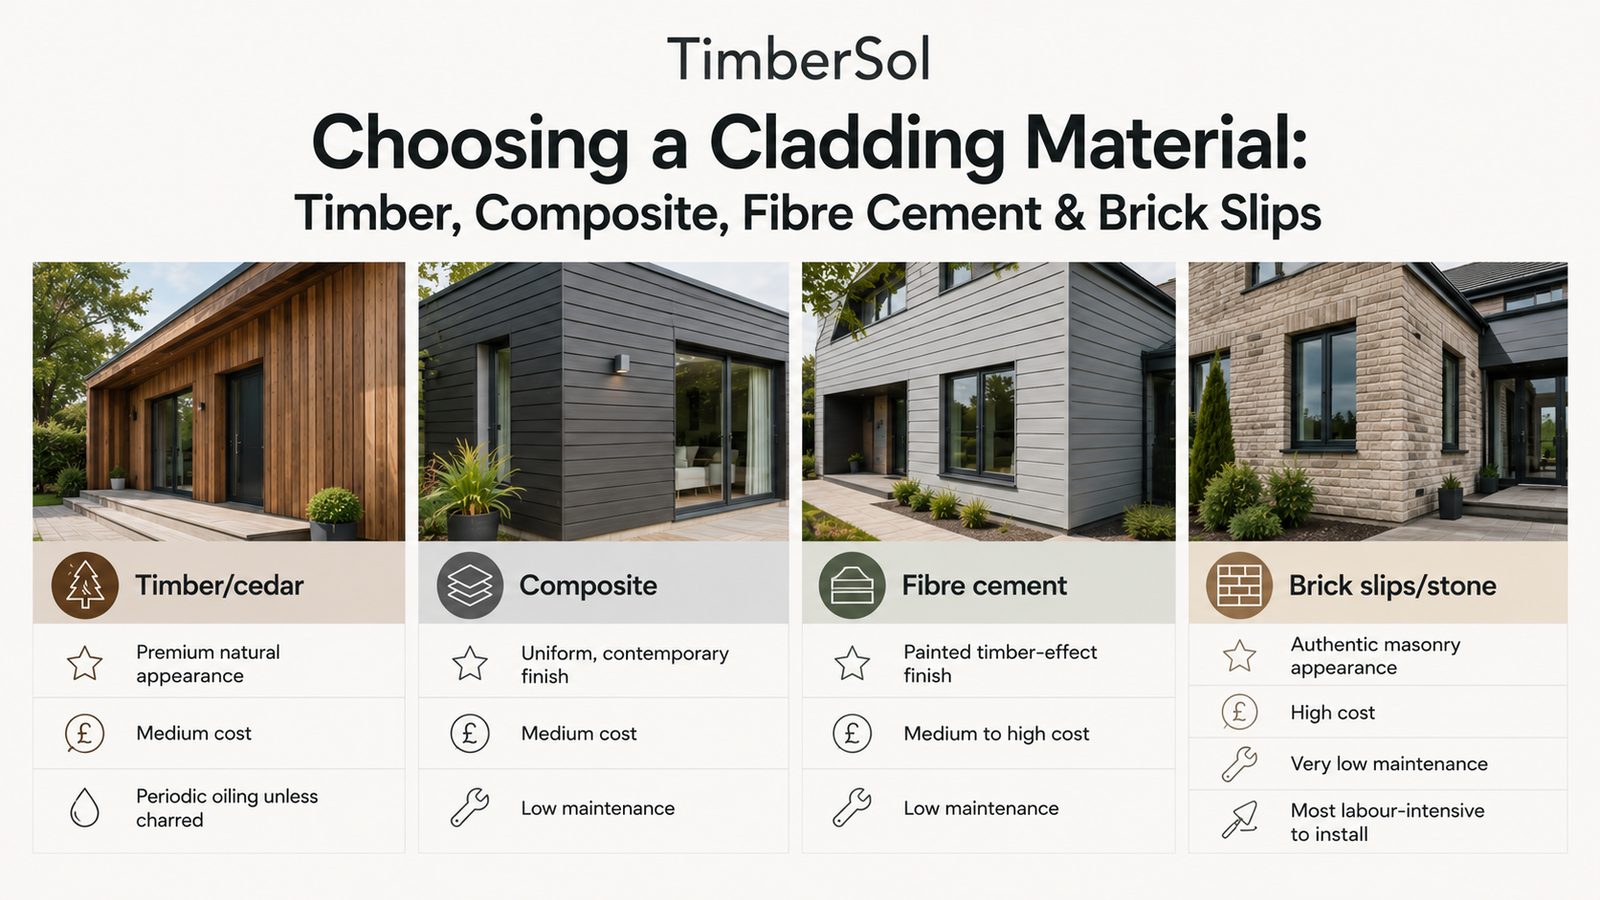
Weigh four key criteria before making your decision: appearance, lifespan, maintenance, and cost. Considering all four together helps you avoid paying for durability you don’t need or maintenance you won’t keep up with.
- Timber/cedar: Premium natural appearance, medium cost, periodic oiling unless charred.
- Composite: Uniform, contemporary finish, medium cost, low maintenance.
- Fibre cement: Painted timber-effect finish, medium to high cost, low maintenance.
- Brick slips/stone: Authentic masonry appearance, high cost, very low maintenance, most labour-intensive to install.
The right choice depends on the building’s style, its exposure to the elements, and how much ongoing maintenance the owner is willing to undertake.
Timber & Cedar Cladding
Natural timber species such as Western Red Cedar, larch, and Douglas fir bring warmth and distinctive grain to a façade. However, untreated timber requires periodic oiling, and using high-quality timber coatings helps improve weather resistance while preserving the wood’s natural appearance. Without proper protection, the surface gradually weathers to a silver-grey colour.
Charred timber (Yakisugi or Shou Sugi Ban) takes a different approach. Controlled surface charring creates a protective carbon layer that improves resistance to moisture, insects, and decay, making it lower maintenance than untreated softwood.
TimberSol’s charred timber cladding is available in larch, spruce, oak, ThermoWood, and Accoya, with each board brushed and oil-finished so the charred surface does not rub off during normal use. Its distinctive contemporary finish is well suited to modern house exteriors, extensions, and garden rooms.
Composite Cladding
Wood-plastic composite resists rot, insect attack, and fading, so maintenance rarely extends beyond an occasional wash. Its low-maintenance performance comes from its engineered composition rather than the natural properties of timber.
The trade-off is appearance. Composite boards offer a uniform, manufactured finish at a medium price point, but lack the depth and character of natural timber.
For these reasons, composite is well suited to DIYers who want a quick installation and minimal long-term maintenance, prioritising convenience over a fully natural appearance.
Fibre Cement Weatherboard
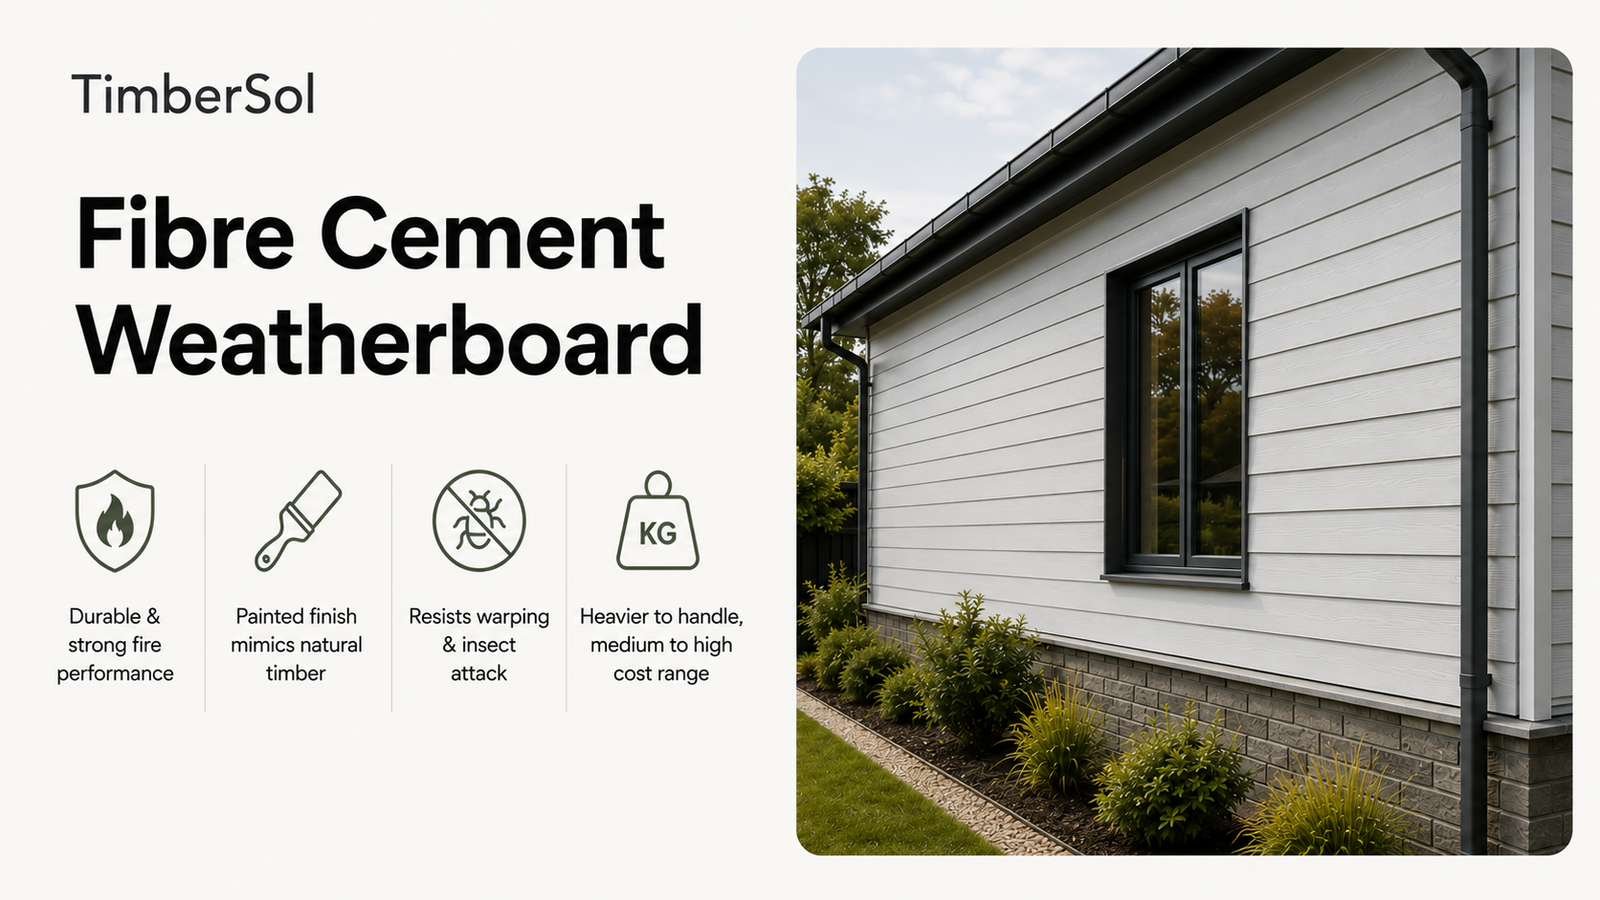
Fibre cement boards, such as James Hardie weatherboards, offer excellent durability, strong fire performance, and a painted finish that mimics natural timber. They resist warping and insect attack because the material is mineral-based rather than organic.
Colour remains stable over time, so repainting is only needed infrequently, making fibre cement a popular choice for low-maintenance house exteriors.
The trade-off is weight. The boards are heavier to handle and fall into the medium to high price range, increasing both installation effort and overall cost.
Brick Slips & Stone Cladding
Brick slips are thin sections of brick bonded to the wall, giving the appearance of traditional brickwork without the depth of full bricks. Stone cladding works in the same way, with the stone fixed as a facing rather than a structural layer.
Both sit at the premium end of the market, offering very low maintenance but requiring the most labour-intensive installation.
Compared with full brick construction, brick slips are lighter, more cost-effective, and require no new foundations because they carry no structural load. This makes them a practical choice for retrofitting over sound brickwork.
Do You Need a Membrane and Ventilation Behind Cladding?
Yes, a breather membrane is strongly recommended, especially over older brickwork, because it sheds water while allowing trapped moisture to escape. This helps prevent damp and timber rot behind the cladding.
Equally important is the drained, ventilated cavity created by the battens. The cavity should remain open at the top and bottom, allowing any water that passes behind the boards to drain away while air circulates freely.
Keep the ventilation gaps continuous along the full length of the top and bottom of the cavity. The bottom edge of the cladding should be at least 200 mm above ground level to prevent rain splashback from staining the boards.
Fit insect mesh over the openings at the top and bottom of the cavity to maintain airflow while keeping pests out.
Without a cavity or breather membrane, moisture can become trapped against both the brickwork and the cladding. As a result, decay can develop, significantly reducing the lifespan of the entire system.
How to Install Cladding Over Brick?
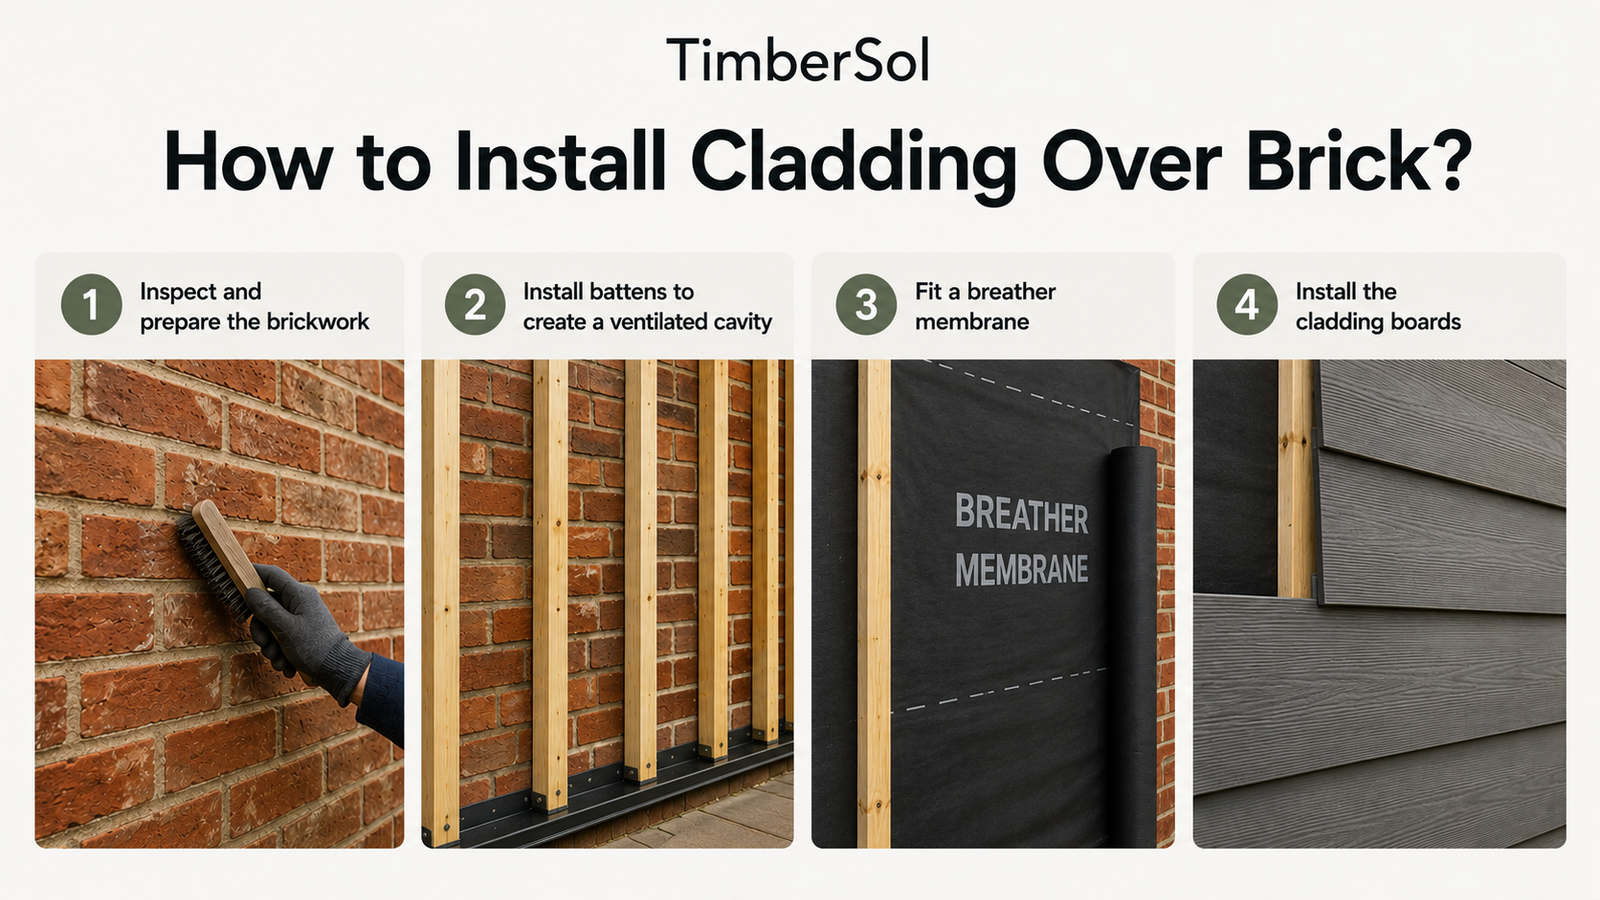
The process follows four main stages: inspect and prepare the brickwork, install battens to create a ventilated cavity, fit a breather membrane, and then install the cladding boards.
Start by inspecting the wall for damp, spalled bricks, and loose mortar. Repair any defects first, as cladding cannot correct an unsound wall and will only trap the problem behind it.
Consistency is then key. Battens must be installed plumb and level, packed out wherever the brickwork is uneven, so the finished cladding sits flat across the entire façade.
Fix the Battens to Brick Correctly
Use Class 3 pressure-treated battens, which provide a desired service life of approximately 30 years. The battens should be at least twice the thickness of the cladding. Fix them to the brick using masonry plugs at approximately 400–500 mm centres, and use only stainless steel or other corrosion-resistant fixings, as ordinary steel can stain the boards and corrode prematurely.
Batten orientation depends on the direction of the cladding. For horizontal cladding, install vertical battens. For vertical cladding, install horizontal battens over vertical counter-battens, following the Vastern masonry detail. This arrangement ensures that water can drain freely and air can circulate behind the cladding boards.
Install battens with a maximum moisture content of 20%; otherwise, they may shrink after installation, causing the entire cladding system to loosen. Choose a timber species with a minimum density of approximately 350 kg/m³, as denser timber provides more secure fixing retention when attached to a masonry substrate.
Plan the Layout & Fix the Boards
Start by setting out the board lines from a clean, level datum, balancing the cut boards at the top and bottom so the façade reads evenly. A carefully measured layout avoids a thin, awkward strip at one edge.
Fix the boards to the outer face of the battens using the manufacturer’s recommended fixings and gaps for the chosen profile, whether shiplap, shadow gap, or feather edge.
Use matched corner trims and leave the specified expansion gaps, as timber moves with seasonal changes in humidity. Apply a final coat of oil to the timber where required to achieve the desired finish.
TimberSol offers a board calculator and an installation guide to help plan quantities and detailing accurately.
What Does It Cost to Clad Over Brick, and What Is the Cheapest Way to Cover It?
Total cost depends on the material, board profile, wall area, and whether you do the work yourself or hire an installer. The choice of material accounts for the largest part of the budget, so it pays to compare options before committing.
By relative cost band:
- Lowest cost: uPVC/vinyl and treated softwood timber
- Mid-range: composite and fibre-cement weatherboard
- Upper end: brick slips, stone, and premium charred timber
Then budget for the supporting layers: battens, a breathable membrane, corrosion-resistant fixings, corner trims, and any cavity insulation. These items are small individually but add up across the entire façade.
A DIY installation can significantly reduce the total cost because labour is often the largest cost item. However, correct cavity and membrane detailing still matters, as skimping on these can shorten the life of the entire system.
For a charred timber façade, order samples and request a quote from our team to obtain an accurate price for your wall area. Finance is available for larger projects.
Cladding Over Brick: FAQ
Can You Put Cladding Over Brick?
Yes, cladding can be installed over existing brickwork and is a quick, cost-effective way to refresh a façade or improve weather resistance. The brick must be sound first, with no rising damp, spalling or loose mortar, since cladding traps underlying defects rather than curing them.
Cladding fixes to a batten frame, never directly to the brick, so the battens create the drained, ventilated cavity the system relies on.
What Is the Cheapest Way to Cover Brick?
uPVC, vinyl and treated softwood timber are typically the lowest-cost materials, while composite and fibre cement sit mid-range, and brick slips and premium charred timber sit at the top.
DIY installation lowers the total cost significantly because labour is usually the largest line item. Even so, the cavity and membrane must be detailed correctly, otherwise trapped moisture shortens the life of the cheaper boards you have just fitted.
How Do You Attach Cladding to a Brick Wall?
Check and prep the brick first, then fix treated timber or aluminium battens to the masonry with plugs and corrosion-resistant fixings, leaving continuous ventilation gaps before fixing the boards to the battens.
The battens must be plumb, level and packed out where the wall is uneven, since the finished cladding follows the line of the framework rather than the brick behind it.
Do You Need a Membrane Under Cladding Over Brick?
A breathable, vapour-permeable membrane is strongly recommended, especially on older brick. It keeps driven rain out while letting any trapped moisture escape, which prevents damp and rot building up behind the cladding.
Skipping it leaves moisture sitting against the brick and the boards, so the membrane protects the whole assembly for the long term.
Once the battens and membrane are in place, the cladding board you choose sets the final character of the wall. TimberSol crafts charred Yakisugi timber in species like larch, spruce, Douglas fir and Accoya, finished in shades from deep black to anthracite grey, so a tired brick wall becomes a striking, low-maintenance facade. The protective carbon layer and oil finish work with a drained, ventilated cavity to resist moisture, rot and insects for years of reliable service.
If you are planning to clad over brick, order a sample to see the finish in person, or get in touch for a quote and tailored sizing to match your project. Our team is happy to guide self-builders, architects and trade through batten spacing, fixings and detailing so the whole system performs as it should.